Showing posts with label soil. Show all posts

Thursday, March 8, 2018

GOOD HEALTH STARTS WITH THE SOIL

BALANCED SOIL ǁ HEALTHY PLANTS ǁ NUTRIENT DENSE FOOD

OVERVIEW:  Much as if you are able to fight off the common cold when your health is at its best, plants are better able to withstand pest and disease pressures when your soil is at its optimum.  Healthy plants produce vegetables with better flavor, greater yields, and food with higher nutrient densities. By naturally encouraging soil life and keeping your pH in balance, you build a solid foundation that unleashes the power of the soil, enabling plants to thrive, obtain the nutrients they need, and reach their full potential.

HEALTHY pH:  While fertility is obvious as an aspect of any good garden soil, pH is equally as important.  Soil that is either too acidic or alkaline creates an upset in the soil chemistry.  This locks up nutrients so plants cannot absorb them.  Knowledge of your pH allows you to make sound decisions when adding organic matter, either to bring your soil into balance naturally or to maintain the healthy ecosystem you have already built.  Most vegetables will thrive and do well if the pH is between 6 - 7.0 and many tend to prefer neutral conditions.

ALKALINE SOILS:  (pH of 7.5 or over)  Seek out organic matter that will not only buffer the soil’s pH, but also have an acidifying effect as it breaks down.  Things such as oak leaves (most acidifying of all leaves), leaf mold, ground bark, aged sawdust, peat moss, pine needles, and mini pine bark mulch will all work well. 

These types of amendments can take several months or more to work.  However, their benefits will far outlast any form of sulfur.  Moreover, while sulfur is most often the recommendation for lowering your pH, some forms can have very damaging effects on soil organisms.  Because alkaline soils lock up the ability of plants to uptake many of the micro-nutrients, foliar feeding is a good choice for alleviating any deficiencies.

Plants that do well in alkaline soils are asparagus, beets, cabbage family or brassicas, garlic, green beans, lettuce, melons, okra, onions, spinach, and Swiss chard.

ACIDIC SOILS:  (pH of 6.0 or under) In acidic soils, organic matter is unhurried to break down as soil organisms slow, therefore, reducing nutrient availability.  Add abundant amounts of organic matter above the 1/3 rule to increase both the buffering capacity of the soil and the plants ability to tolerant acidity.  Seek out organic matter that will also help with raising pH levels to where plants will be readily able to obtain nutrients.  Well-aged manure (Black Kow) is a good choice as it supplies both calcium and magnesium and is slightly alkaline.  Avoid acidifying fertilizers and look to things like bone meal, rock dusts, or guano for nutrients.

Wood ashes are wonderful for raising the pH if used carefully.  They supply potassium, calcium, and magnesium.  Their maximum application rate is 1.5 pounds per 100 square feet.  Wood ashes can impede germination and burn plants, so it is wise to add them a few weeks ahead of planting.  

Oyster shells are also another good option to raise pH.  

Plants that will thrive in acidic environments are blueberries, gooseberries, potatoes, raspberries, and strawberries.

Happy Gardening,

Denise, Beds 25 & 29

Sunday, March 13, 2016

Working On My Night Moves!

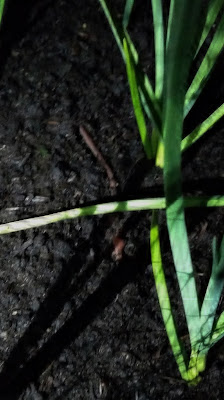
Worms mating in Bed 25!
So it's Saturday night and I'm out in the garden working on my night moves (don't laugh, you can learn a wealth of information about your garden by checking it at night) and low and behold I stumbled upon the best photo opportunity ever.  I hope you are able to make this out despite a horrible attempt at making a great photo with less than adequate lighting.

Two worms were mating on top of the soil within the garlic patch. Usually, this is something commonly seen a little later in the spring, but this year our temperatures at night are running somewhat above average (soil temperature is 66 degrees F at close to midnight).  Seeing the soil once again alive after dark is such a reflection of the seasonal change making one quite hopeful for the harvest to come.  It's definitely planting season.

Earthworms play such a vital role in the fertility, health, and productivity of the soil.  They serve as excellent indicators of overall soil condition.  The earthworm, being a superstar underground, has the ability to affect the nutrient-supplying power of your soil.  They take organic matter, ingest and digest it, then excrete casts (worm poop) loaded with nutrients they don't utilize for their own nutrition.  These casts serve as a valuable source of organic fertilizer for vegetative plant growth.  The richness of the casts and the productivity of your soil are then determined by the varied type of diet you feed the worms and the worm populations that are present. Healthy living soil would then provide you with productive, well-fed, healthy, and happy plants.
  
Normally, one would hope not to find any creatures doing the wild thing in the garden so late at night, but these guys are definitely guaranteed a hall pass as well as a little privacy. Night, night, little worms, I'm in awe of all you do!

Green Meadows Healthy Garden Tip:

For those who would like to determine if they have worm populations effective enough to support healthy plant growth, we did an article a couple years back with some simple observations you can make and suggestions for increasing worm activity.  Here's the link below for your convenience.  Also, remember you can search the blog for topics of interests as your team has written a wealth of information for you to enjoy.

http://greenmeadowscommunitygarden.blogspot.com/2013/12/if-worms-could-talk.html - link to a previous post on worms.

Happy Gardening,

Denise, Beds 25 & 29
Sunday, January 18, 2015

Eggshells Are'nt Just For The Compost Heap!


Yummy, nothing will
go to waste!
It's no secret that I come from a family that enjoys eggs.  Breakfast or dinner, you make them and I'm there!  Sometimes I wonder if my "love affair" of them is from the flavor of the eggs themselves or the fact that the shells are so useful in the garden.

For many years, they were a mainstay simply for deterring slugs and snails around the lettuce and spinach plants.  Nevertheless, as we grow and learn, they are now a favorite "go to item" for a wealth of other uses as well.

Let's start with some basics.  Calcium is one of the top secondary nutrients that plants need in order to develop strong cellular structures. When plants are deficient, it can show up as anything from blossom end rot on fruiting plants to tip-burn on the lettuces and brassica's.  Some plants can even develop twisted leaves while others will remain stunted as the plants fail to thrive.  Disease pathogens and insects are also much more likely to attack vegetable plants with weakened cell systems according to several extension services.  Simply put, all plants need calcium to remain healthy and some like tomatoes need a little more than others do.  Eggshells are just one of the resources readily available to get plants a nutrient they need in order for them to do well.

Finely crushed eggshells!
It's quite easy to throw eggshells in the compost heap and let the calcium they release nourish the pile as they break down over time. However, if you're anything like me and want a little instant gratification in the garden, at little to no cost, there are many other ways to utilize them.  These are some of my favorites outside of using them in the compost pile:
  1. 1. Calcium and Magnesium Fertilizer/Tea - Tomatoes, peppers, eggplants, and such (the nightshades) all thrive with fertilizers rich in calcium and magnesium.  For an organic boost, boil enough water to fill a 1-gallon jug, add 2 tablespoons of crushed eggshells and 1 teaspoon of Epsom salts.  Let the mixture steep a couple days and strain the eggshells back out. This makes a wonderful foliar feeding early in the morning when the plants stomata (pores) are open.  It is also great as a soil drench, any time of day, which doesn't require you to strain the shells.  If you have hard-boiled some eggs, save the water. Mix 1 cup left over egg water to one gallon hot water (no need to boil) and add the Epsom salts. Shake well and this will be ready to use as soon as the salts dissolve and the mixture cools.
  2. Seedlings - Most often, I tend to utilize the compost and worm teas for seedlings with my eggshell bits placed in the pots.  However, the recipe above works very well for supplemental feeding at 1/4 strength.  Some gardeners will actually start their seedlings in used eggshells for the calcium boost.  I have never found this method to be of much use.  For me, it seems as if the containers are too fragile and the plants will readily outgrow their environment.  Instead, whenever potting up, I usually just throw a teaspoonful of shells in the container with a little worm castings and pinch of Epsom salts for good measure. 
  3. Planting Hole - One of the best ways to supplement your soil with calcium and trace minerals is to place a handful of eggshells in the planting hole.  Mix these in with other amendments such as compost, worm castings, etc. for a steady supply of food to get plants off to a great start.  While calcium is considered as a secondary nutrient, it does go a long way with the nightshades to keep them healthy during periods of plant stress.  
  4. Soil Amendment - If you save your eggshells year round or have a source for supply, they make a wonderful soil amendment.  Because of their high surface area to volume ratio, they decompose rapidly in the soil offering calcium and trace minerals within a very short period.  The smaller you crush the shells before using, the more rapidly they will break down.  It can be hard to find the recommended rate for adding eggshells as a pure soil amendment.  I did find a chart on Grow it Organically.com with some recommendations.  http://www.grow-it-organically.com/organic-calcium-sources.html - link to chart on organic calcium supplements for soil additions and recommended rates.  Eggshells are on the list.   
  5. Pest Deterrent - Using crushed eggshells in and around plants is a wonderful way to cut down on slugs, snails, and any other mollusk type pests.  The sharp jagged edges of the shells are usually enough to deter them to other areas outside the garden where the pickings are easier for them to feed.  Between eggshells and beer, you can usually keep these pests at bay without the need for any chemical intervention.    
  6. Rinsed and  heat drying
    on the grill!
  7. Feeding the Birds - Before and after laying eggs, mother birds need extra calcium in their diets.  To reduce the risk of transferring any salmonella to the birds, either boil your shells or bake them at 250 degrees Fahrenheit for ten to fifteen minutes.  Allow the shells to cool and then add them to your existing feeders.  Many times, I'll mix the shells with whatever I have out for the birds, but other times I like to place a small tray out by itself to watch the robins go wild when they're nesting.  They can't seem to get enough of them.  I've also read before that just mixing the gritty shell bits with birdseed will help all birds digest their food more easily. 
Green Meadows Healthy Garden Tip:

There is much information out there, as to whether or not raw eggshells pose a risk of contaminating the soil with salmonella.  According to Food Research International, salmonella, many other fungi, and bacterium's can live in the soil for extended periods and are most likely already present.  This we all pretty much know and by assuming good gardening and proper food hygiene practices, rarely will these bacterium's and fungi ever pose any type of threat.  However, the MSU Extension Service does site that any type of hot composting (temperatures of 140 - 160 degrees F) will kill the salmonella bacteria. 

As far as other uses for shells in the garden, recommendations vary and run from a general rinsing and drying to sanitizing for safety.  I'm always a little OCD and would rather error on the side of caution whenever using the shells.  If throwing them in the compost they are merely rinsed since I trust the process.  For all other uses in the garden, they are treated as if they were going to the birds.  I figure that if they are on top the soil as a pest deterrent and birds get into them, well I would hate for the potential to do any harm. I also go the extra length as a precaution since much of the foliar spraying happens when vegetables are producing on the plants.  This gives me the greatest comfort level of using them safely. 

Happy Gardening,

Denise, Beds 25 & 29

Saturday, May 10, 2014

It's Tea Time!

Hey Everyone,

One of the best ways to enhance the growth of your plants while fostering long-term soil fertility is with the use of compost teas.  For organic gardeners, these teas are excellent tools for providing the bacterial nutrition that vegetables seem to love.  The beneficial microbes and organisms found in these teas also work hard as a first line of defense against many of the pathogens that can cause disease.  In addition, they work extremely well at keeping many pesky insects at bay.

There are several applications where compost and/or worm teas can be effective:

Both effective and inexpensive!
  • A seed treatment - Soaking seeds in a solution of compost tea prior to planting inoculates your seeds against harmful fungi and speeds the germination process. 
  • Transplant time - When the time comes to move plants up in pot size or transplant directly into the garden, this is a wonderful opportunity to use a compost tea solution.  The tea's not only provide a healthy dose of nutritious food but go a long way in preventing transplant shock as well as disease resistance, getting your plants off to a fast and healthy start.
  • Foliar applications - Whenever you need nutrition to plants in a hurry, a foliar application of tea gets the nutrition there immediately.  Foliar applications are also an excellent method for awakening your plants defense mechanisms early.
  • Root and/or soil drenches - Using compost teas as a root and/or soil drench promotes healthy plant development and growth as well as long-term soil fertility.  
  • Standard fertilization - Compost teas are wonderful as part of a standard fertilization practice. Routine applications not only keep plants healthy and happy but are also known to increase both flower and fruit production.  
For the home gardener, there are two simple methods for brewing compost tea with an aerated system providing the best quality brew.  For those who may be interested a link is below to a previous post with instructions on how to make the tea using both methods.  I also included a link to One Yard Revolution that has an informative video on making the tea with worm castings and using it appropriately.

My Favorite Recipes for Simple 5-Gallon Bucket Brew's
Worm Based -
  • 5 gallons de-chlorinated or rain water
  • 2 1/2 - 3 cups quality worm castings
  • 1 - 2 oz. Grandma's Original All Natural Unsulphured Molasses
Compost Based -
  • 5 gallons de-chlorinated or rain water
  • Good quality compost - Biodynamic Blends such as Malibu Compost or Farmer D Compost are incredible for the garden and provide increased production.  Biodynamic blends also provide some systemic insect resistance due to their ingredients.  It is also possible to use things as simple as Black Kow Composted Cow Manure and make additions depending on your specific needs.
  • 1 - 2 oz. Grandma's Original All Natural Unsulphured Molasses
  • Extra additions of worm castings, liquid fish, seaweed, or kelp depending on application and foliar manipulation desired.

Green Meadows Healthy Garden Tip:

For compost teas to be effective, it is important to cover at least 70% of all plant surfaces. The pores or tiny openings on the leaves (mainly the underside) and stems called stomata act as a catalyst for the uptake of nutrients as well as aid in photosynthesis and transpiration.  When the temperatures reach 80 degrees, the stomata start to close and at temperatures above 85 degrees, they close completely as part of a defense mechanism to prevent moisture loss within the plant.  Therefore, by using teas in either the morning or early evening and making sure to coat the undersides of all vegetation, your plants will get the most value from the application.   Please keep in mind that compost and/or worm teas are not a substitute for good soil fertility practices but rather a partner in the process of keeping your vegetables healthy and productive.
Yummy!

For those who enjoy additional reading, the book "Teaming with Microbes" by Jeff Lowenfels & Wayne Lewis has excellent information on compost teas and their use.  The National Sustainable Agriculture Information Service also has some reading that is interesting on teas at the agricultural level.  This information is easily applicable to home garden practices. Their links are excellent and also below for your convenience.


Links:

http://greenmeadowscommunitygarden.blogspot.com/2013/04/making-worm-tea.html - link to previous post on making worm tea

http://www.youtube.com/watch?v=_4VKLtDuzD8 - link to One Yard Revolution's video on making worm tea and using it appropriately 

https://attra.ncat.org/attra-pub/viewhtml.php?id=125 - link to "Notes on Compost Teas" from the National Sustainable Agriculture Information Service

https://attra.ncat.org/attra-pub/viewhtml.php?id=286 - link to "Foliar Fertilization" from the National Sustainable Agriculture Information Service

Happy Gardening,

Denise, Beds 25 & 29

Wednesday, April 2, 2014

Secrets To Growing A Healthy Garden!

Hey Everyone,

Growing that healthy vegetable garden really doesn't take the green thumb that so many feel they need. 
It only takes a little knowledge of a few basic concepts.  The equation is simple.  
                         Healthy Soil = Healthy Plants = Bountiful Harvest of Nutrient Rich Food.

Determine what your vegetable plants need:  

Every type of vegetable plant family has specific needs or preferences in order for them to be healthy and productive.  Some vegetables can be a little more finicky than others can.  However, if you provide the basics below they tend to be less sensitive to their specific needs and perform well under most conditions.
  • The correct soil fertility and pH - Most vegetables prefer a soil pH between 6.0 and 7.0.  Make sure to amend properly with the correct amount of organic matter and perform a soil test to correct any imbalances in soil pH.  As a rule of thumb, gardeners need to add at least a 3-inch layer of compost/organic matter unless you will be heavily dependent on fertilizers.  If you garden bio-intensively or use other methods to maximize your harvest, then you will need a little more to replenish the depleted nutrients in your soil. 
  • Healthy microbial soil life - Healthy soil isn't just dirt.  It is a complete active ecosystem full of life with a well-balanced system of bacteria, organisms, and fungi that all interact with the roots of your plants.  Getting it right often fends off many of the diseases and pests that plague vegetable gardens.  As your soil builds, worms will come to the surface as if they were dolphins grazing on organic matter taking it deeper into the soil where it will be readily turned into nutrition for your plants.  If you do not see signs of life in your soil, this can be a red flag that conditions are not conducive for healthy plant growth. 
  • Sunlight and moisture - Intense sunlight maximizes the photosynthesis in plants.  In tomatoes, this process allows the plants to make carbohydrates that later turn into the sugars and acids for that rich old-time flavor we so desire.  Both plant labels and seed packets have the light conditions required for optimal growth and production.  For healthy plants, it is also imperative to keep your water schedule consistent.   Disease is far more likely to occur in plants that are water stressed.  Raised beds do dry out much quicker than conventional in-ground gardens and need watered more often.  
  • Ideal temperatures - One of the top ten mistakes gardeners make is planting out at the wrong time.  When plants are placed in soils that haven't warmed properly they will most often sit idle waiting for the signal that it's time to grow.  During this idle phase they are more susceptible to insects and harmful soil pathogens that cause disease.

Happy Gardening,

Denise, Beds 25 & 29

Monday, March 10, 2014

Should I Test My Soil?

Hey Everyone,

We have often heard that the secret to growing great vegetables starts with the soil.  Having the proper nutrients readily available and a pH in balance so plants can attain them is imperative for a healthy and productive garden.  The pH range for most vegetables to thrive is between 6.0 and 7.0, although they will tolerate a range from 5.0 to 7.5.  This pH range is also favorable for earthworms, microbes, and soil organisms to flourish.
Soil Test Bags
Soil Sample Bags are available
 in the shed
for your convenience!

Soil tests can save you time and money, as they are an excellent tool for identifying deficits as well as extremes in your soil.  They also provide a snapshot of the overall balance of nutrient levels enabling you to add only what your soil really needs.  For healthy plants to thrive there are 16 essential elements required.  Over a dozen of these are in the form of macro and micronutrients coming primarily from the soil.  If shortages or excesses are present or a pH is out of balance preventing plants from getting the nutrients they need, problems can and will occur.  Plants are much more likely to develop disease and nutritional deficiencies since they lack what is necessary for proper growth and development.  Yield and vigor will also undoubtedly be less.   

Many often ask how often and when should soil be tested. According to the U.S. Department of Agriculture as well as many extension offices across the U.S., these are some general guidelines as a rule of thumb for vegetable gardeners.
  • Test before gardening in any new area.  The results of a soil test are invaluable for providing an accurate baseline to identify any potential problems that need addressed. 
  • Conventional home gardeners - usually every couple of years is sufficient for keeping soils in prime condition unless you are experiencing difficulties.  If you have done a soil test requiring a correction in soil fertility, special elements, and/or pH, it is also wise to retest the following year to make sure the problem is rectified.  As a special note - UGA as well as a few others do recommend testing vegetable gardens on an annual basis for optimum production and soil health.
  • Test any time you suspect a nutrient or pH problem.
  • Test any time you plan to make a major change in what you are growing in that particular area.  An example would be if you are growing vegetables and want to make a change to blueberries, raspberries, etc.  These have different pH and fertilization requirements.
  • Test at the same time of the year to maintain a comparative analysis of where your soil stands.  
For those who are interested in having a lab based soil test, the link below is for your convenience.  I have also placed a link with the fee schedules for the different types of tests that the extension service currently offers.  If you scroll down to page 12 and beyond the prices for the individual tests are listed. Basic routine tests are as low as $6.00 and more often than not pay for themselves since you are only adding what your soil really needs.

http://aesl.ces.uga.edu/ - link to the Agricultural & Environmental Services Laboratories home page with soil testing information and links.

http://aesl.ces.uga.edu/FeeSchedule.pdf - link to the fee schedule for soil testing at UGA's Extension Service.  Scroll down to page 12 and beyond.

Happy Gardening,

Denise, Beds 25 & 29

Friday, February 21, 2014

Am I Ready For Spring Planting!

Hey Everyone,

All this wonderful weather is bringing us out to work on our beds and many are wondering when the right time to plant may be.  For the greatest success, it is important to look at several indicators other than just the weather or a date on the calendar before planting out.

Welcome to our garden Reagan!
Love your boots! 
While the sun is shining and the air temperatures have us chomping at the bit, the soil temperatures and workability are what is the most important.  Also, keep in mind how you will care for your seedlings and transplants once the cold weather returns.  Am I prepared for a frost and/or potentially a hard freeze?

Soil Temperatures - Spring 2014:

I took our initial baseline temperatures for spring planting last Sunday afternoon.  The soil temperatures in the garden are running between 39 - 48 degrees for all uncovered beds.  Those who have been diligent with their frost protection have temperatures currently in the mid 50's.  As one would expect the temperatures vary depending on how much sun and windbreak each bed receives.  We do have one exceptionally warm bed showing early signs of germination with a soil temperature of 58.9 degrees.  This bed will be the subject of another post.  Way to go Amy!

So what is the proper soil temperature for planting?  If you are direct sowing seed, each vegetable packet will list the optimum range for germination and the start of sustained growth. This is not the air temperature, but the temperature required of the ground.  You will also see a number for how many days it takes the seeds to germinate.  Take Redventure celery for example, the soil temperature needed to break dormancy of the seed is 55 -70 degrees Fahrenheit.  Germination will likely occur within 10 - 20 days.  This means if you plant the celery seed now, it will do nothing, wait until the soil temps rise to 55 degrees and it will probably take right around 20 days.  Let the soil warm a bit more and germination will occur more rapidly.  When the soil temperatures rise over 70 degrees, the higher end of the celery's spectrum, the rates for success at germinating the celery seed will then start to decline rapidly.  Also, keep in mind that many vegetables like celery will perform better as a transplant vs. direct sowing.

Mike, Sue, & Amy
Enjoying some time in the garden!
Most often, sowing seeds outside their normal temperature range leads to spotty germination, rotting, molding, and/or losing all viability within the ground.  If you are lucky enough for germination to occur, tremendous care will be needed to raise healthy plants as the environment is not yet conducive for sustaining the demand of their early growth.

What if I start with transplants?  If you start your garden with transplants that you have purchased or raised indoors, it is easy to follow the same guidelines.  If you utilize that same variety of celery as a transplant, it still requires the proper growing environment to do well.  This includes adequately warmed soil temperatures within the plants range to sustain that early growth.  There is nothing wrong with buying the plants now as you find them, however, it is beneficial to pot them up, prepare the garden bed with an environment conducive to your plant's needs, inoculate them to resist early pests and disease, and when soil temperatures are optimum, you are ready to go.

Green Meadows Healthy Garden Tip:

Planting in soils that have not properly warmed often sets the stage for the fungal attacks of many undesirable plant diseases.  It also weakens otherwise healthy transplants to the point they become vulnerable to assaults from a variety of pests.  This in turn fosters the use of additional pesticides and fungicides not only just for you but also for the community garden as a whole since disease and insects know no boundaries and will rapidly spread elsewhere.  Taking small steps to keep the garden healthy ensures we all get the most back from the time and effort we put in.

Definition of Soil Workability Explained:

Wonderful, workable soil with
a texture perfect for growing carrots!
So what does sow in early spring when the ground is workable really mean?  While we would like to think if the ground isn't frozen, it is workable.  Unfortunately, this isn't necessarily the case. Workable soil means the frost is completely worked out at all levels and no pockets remain.  The texture of the soil, although cool, is every bit as nice and easily amendable similar to what we would expect months from now.  Microbial life is coming out of hibernation and we see signs of its largest life form (the earthworm) being a little less sluggish.  The moisture content and soil temperatures are carefully balanced to prevent seeds from mold and rot and the environment is ready and conducive for young seedlings and transplants to thrive.  This is also a wonderful time to peek in on your pH and see if any attention is required.

It will be interesting to take another temperature reading this weekend to see how the warmer weather has affected things this week.  Over the next several weeks, we will be watching as things heat up for the planting season and once again be running our Chilly Nilly, Garden Hottie, and Average Joe/Jane contests for prizes.  I hope you will enjoy and follow along with us!

Happy Gardening,

Denise, Beds 25 & 29

A fork or a shovel - which is the best to use when turning the soil

Shovel and spading fork
Officially there is no "right" tool to use. But on a more personal level, everyone has a preference. I prefer using a spading fork because the tines are flat and broad. (Also it has a short handle which works great for short people.)

Taller friends of mine use a pitch fork because the handle is longer. The drawback is that the tines are thin and spiky though the tines are closer together than the tines of the spading fork.  My tall friends have used the spading fork but after awhile, it kills their back because the handle is too short for them.

You can  just use a shovel (long or short handled depending on your height) to turn the soil as well.


 Here you can see the progression of digging with the spading fork. The first forkful there is kind of a clump of dirt. The second forkful, it is falling through the tines. If you think your soil might be a little too wet, this is a great tool to use to prevent making clumps of dirt.

I also find that when I'm mixing in my amendments they tend to blend better when I use the spading fork. Kind of like a whisk works to blend flour and sugar in a bowl.  Shovels tend to make it harder for me to mix my amendments. But I do know people who only use a shovel and still have beautiful, to die for, soil.

 As you can see, when using a shovel, the first shovelful of dirt is a big clump. It will take more effort to keep from creating a bed full of clumping wet clods if the soil is too wet.

A compromise if you aren't certain about your soil moisture level is to turn/fluff your soil with the spading fork for as long as your back can handle it and then mix in your soil amendments with a shovel.

But really, it all boils down to what YOU like and what YOUR body can tolerate! As long as you end up with beautiful, healthy, fertile soil, it doesn't matter what you use to turn it.

Thursday, February 20, 2014

Why keep water out of your bed?

Greg just used a tarp and weighed it down with his bags of dirt
Notice the puddle of water in the back corner that collected
from a rain.
You've decided that now is the time to turn your bed and prepare it for spring. After looking at the weather forecast you see there is one day in the middle of the five day forecast that it is going to rain and put more moisture in your bed than you want. (Too much moisture in the soil when you are working with it destroys the soil structure.)

What to do, what to do.

Why you can do what Vann did and Greg, Cheryle and Dianne are doing. Put a lovely layer of plastic on your bed! That way when it does rain, it runs off and the soil is still workable.

Cheryle bought a roll of plastic to use. The remainder of the roll
is in the shed on the counter and can be used by anyone.
One other thing to remember, look at the hourly weather predictions each day besides just the 10 day forecast. Sometimes the hourly shows rain is likely while the 10 day doesn't show any rain. You don't want to have an unpleasant surprise when the hourly is right!

Be sure and cover your soil if you intend to plant and rain is predicted before you'll  be able to do so.  Otherwise, you'll have that pesky too wet to plant situation to wait out.

The extra effort really pays off!

Dianne used two shower curtains.

Tuesday, October 1, 2013

Rejuvenating The Soil For Fall - Garden Soil Rejuvenation - Option 2 of 3

Ready To Go!
Hey Everyone,

Garden Soil Rejuvenation is one of my favorite methods for restoration and maintenance of the garden, especially when disease and pests have been present.  This method is for those that want to build their soil naturally over time, starve pathogens by rotating crops within the bed, keep their gardens actively producing, and protect the integrity of the soil food web by keeping it alive and nourished.  Many gardeners believe that building good soil over time is the key to success for not only growing strong vigorous plants, but also growing vegetables with greater nutrient densities.  This requires almost a commitment of stewardship to the dirt.

Option Number Two:  GARDEN SOIL REJUVENATION

Garden Soil Rejuvenation reduces the amount of disease pathogens in the soil by using high quality organic matter, mulches, crop rotation, and simple compost teas to solve problems.   It is a form of restoration and maintenance that can be of great benefit if done properly.  The process is simple.

  • Remove a small portion of soil from the bed, preferably from the diseased area.  This instantly removes a substantial portion of undesirable pathogens.  This soil may be re-used as fill dirt in non-vegetable areas. 
  • Remove all plant debris and roots from the bed that can potentially harbor pathogens. Dispose of these properly and do not compost any diseased plant material.  This is also an excellent time to check your soil thoroughly for any undesirable pests and remove as needed. 
  • Add a substantial influx of high quality organic matter from as many different sources as possible. Most references will recommend at least five sources for the optimum number to hit. Keep in mind that all commercial compost is the by-product of one industry or another; therefore, you need several different kinds to achieve the diversity of micro-organisms in the soil in order for the good microbes to fight off the bad.  A strong army of beneficial organisms can suppress a small army of harmful ones. Homemade compost is always the best, but in its absence, there are several excellent products out there to utilize.  If memory serves me correctly, Gardens Alive even carries one especially designed for fighting blight pathogens in the soil.
  • Mulch all new plantings to provide a ground to plant barrier against disease and to provide food for all the good soil organisms you have just added.
  • Rotate all new plantings to starve any remaining pathogens naturally.  Each year you are able to rotate a crop to a different place in your bed affords more protection against the same diseases returning.  As an example, Early Blight starts as a soil-borne pathogen and tomatoes, peppers, eggplants, and potatoes should not be grown in the same spot next year. One year of rotation is some protection, two years more, and so forth.
  • Use compost teas to inoculate the soil and plants as they contain high concentrations of beneficial microbes that will compete with pathogens for food and space.  Teas form protective barriers around the roots of plants and work incredibly well as a barrier on the leaves.  In addition, they have beneficial nutrients that go to work immediately providing food to nourish your plants at any stage of growth.
  • Fertilize appropriately.  Remember that organic fertilizers with lower NPK numbers are safer for the soil food web. Avoid over fertilization as this can have an adverse effect by tying up the exact nutrients your plants need to flourish as well as cause herbicide injury.
Pros:  Encouraging soil life in addition to crop rotation is the easiest most dramatic way to improve and solve many garden problems. Enhancing the soil with an influx of organic matter will provide instant results and go a long way to building a foundation for producing healthier plants with greater nutrient densities.  Using this method over time will significantly reduce your pests and disease problems.  Much as you are able to fight off the common cold when your health is at its best, plants are better able to withstand pests and disease pressures when they are at their optimum as well.  

Cons:  The only cons to this method are the additional costs associated with purchasing organic matter.
Most bags of organic matter are priced between $5.00 and $8.00, however, by home composting, buying in bulk, utilizing free coffee grounds and leaves, etc., you are able to reduce your costs significantly.

The links below are for your convenience and contain valuable information from previous posts on prepping garden beds and making simple compost teas.  I do want to mention that the soil recipe used in the linked post is not enough organic matter for the amount of disease many experienced in their gardens.  It is more of a standard prep recipe to build the soil when no disease has been present.  For example, this fall I utilized much the same ingredients but intensified the amounts to add a greater influx of microbes to the bed. The addition of fertilizer remains the same at standard usage rates.

http://greenmeadowscommunitygarden.blogspot.com/2013/03/prepping-garden-beds-for-spring.html - link to prepping garden beds.

http://greenmeadowscommunitygarden.blogspot.com/2013/04/making-worm-tea.html - link to making simple teas.

For anyone who likes to do additional reading, Teaming with Microbes by Jeff Lowenfel & Wayne Lewis is an excellent technical reference on the soil food web and the importance it plays in your garden.

Hope this is of great help,

Denise, Beds 25 & 29

Saturday, August 31, 2013

Rejuvenating The Soil For Fall - Biofumigation - Option 1 of 3

Hey Everyone,

Well hard to believe the calendar says it's almost September but coupled along with a few of the chiller evenings and we have a sound reminder that fall is just around the corner.  Many are starting to pull the diseased plant material from their gardens and are taking the necessary steps to prepare the soil for a healthier fall harvest.  With the amount of pests and disease, we experienced over the summer, it is more important than ever to take sound steps now for a healthy fall garden.
This is some nice looking soil!

The easiest way to enhance the health and productivity from your garden is to improve the growing medium or your soil.  Whenever disease and pests have been present, it is important to take steps that break the cycle of the problem for future seasons to come. There are actually three options for re-building your bed and putting pests and soil-borne pathogens at bay.  Each of these options have their own pros and cons so decisions should be made on what works the best for you and what you feel the most comfortable with.  As you see the terms in the next few posts to come, please take the time to educate yourself in order to make informed decisions for a healthier garden.

Option Number One:  BIOFUMIGATION

Biofumication is a process whereby commercial farmers use a synthetic chemical fumigant to kill certain types of soil-borne pathogens.  For the organic home gardener this process is adapted with an all-natural alternative called biofumigation.  Biofumigation utilizes the cover crop of Mighty Mustard to release natural glucosinolates into the soil.  The high levels of glucosinolates found in Mighty Mustard are the chemical properties of the plant that make certain members of the brassica family spicy.  These chemical properties are known to mimic synthetic commercial fungicide treatments and destroy several soil borne pathogens. The glucosinolates are also the basis of many commercial pesticides available to large-scale growers.  In addition, cover crops are of great benefit for adding pure organic matter to the soil.

Pros:  When it comes to using cover crops, the pros are plentiful and live up to the claims they tout if kept healthy and disease free.  For small home gardeners cover crops provide a solution in areas where it is difficult to incorporate long-term crop rotation strategies.  By utilizing the different types of cover crops based on your specific needs and keeping the levels of beneficial microorganisms high and productive, your garden will have a chance to flourish even with pathogenic fungi and bacteria present in the soil.  If you choose to forgo the planting of a fall and winter vegetable garden, this may be an excellent option to re-build your soil.

Cons:  The cons are only a few.  The amount of time it takes to grow a cover crop ties up the planting site for an extended time, which can interfere with planting schedules.  Cover crops can turn a garden into a weedy field if ignored, so do expect extra pests for dinner if neglecting your bed.  For example, the Mighty Mustard mentioned above is known to attract flea beetles.  If you do not currently have flea beetles in your bed, this particular cover crop would introduce them to you.  However, it can work to your advantage as a trap crop if using cover crops on one side of a bed only.  Lastly, would be choosing the wrong type of cover crop based on your particular needs.  For example, if you needed a crop to fix nitrogen into the soil and instead choose one that is nutrient scavenging, it may not accomplish what you set out to do.

As a special note, Mighty Mustard is excellent at destroying pathogens & pests from the soil; however, I cannot find the pathogen that causes early blight on any of its lists of diseases kept at bay.

For those that would like to do some additional reading on biofumigation and cover crops, the links below are for your convenience.

http://www.thegrower.com/issues/the-grower/118501009.html - excellent article on biofumigation.

http://www.mightymustard.com/varieties - A link to the line-up of Mighty Mustard varieties.
http://www.mightymustard.com/uses - link to specific uses for each variety.

http://www.organicgardening.com/learn-and-grow/cover-crop-basics - link to general cover crop information and types.


Johnny's Selected SeedsJohnny's Selected Seeds Company carries a full line of cover crop seeds under the sub-heading of Farm Seed on their website.

Option Two & Three to follow.................

Happy Gardening,

Denise, Beds 25 & 29

Saturday, March 30, 2013

Checkbooks, Stools and the Three Bears


Growing Vegetables is like:

Maintaining a healthy checking account

A 3 legged stool – all legs have to be in balance to stay up right

Using the 3 Bears scale

Out of balance means unhappy and unproductive plants


Remember we talked about the Three Bears Scale previously when it came to the soil level in the garden beds? Well, the Three Bears scale applies to all aspects of gardening.

  Too much       –       Too little         –             Just right 
 

 Too much or too little water. Too much or too little fertilizer. Too much or too little sun.  To achieve that Happy Medium (as in getting the scales to balance to Just Right) think of your bed as a checking account.

 
  You have to make regular deposits because the soil only holds a finite amount of water and fertilizer. When the plant uses fertilizer and water (makes withdrawals) you need to make deposits again.  When the plant has a negative balance in the account….it suffers, quits producing fruit and ultimately dies if no deposits are made. Even if deposits are made to prevent death, the health of the plant has been harmed.

Besides watering and fertilizing, there is a 3rd component to a happy garden. Mulching.


                                                                 photo by Bob Myers

 Gardening is a never ending cycle of adding water, fertilizer and mulch to maintain the health and productivity of the plants we are growing. There is one more aspect you could add to this so that instead of a 3 legged stool it is a 4 legged table - amending the soil.

To amend your soil properly every year, work in 1 – 2 inches of organic matter into the top 6-8 inches of soil. Adding organic amendments increases moisture holding capacity in sandy soils and drainage in clay soils. It also breaks down further to stabilize soil structure and feed microorganisms and add micro nutrients. Denise talked about her favorite method of amending her soil a couple of days ago in her post on Prepping Garden Beds.

Amy Whitney at the Cobb County Extension Office made a post on her blog about Plant Health Management. It is really excellent reading about how important it is to prevent problems from occurring in the first place.

If we water, fertilize, mulch and choose the right plants for the right time of year, we can prevent many of our problems.