Monday, March 11, 2013

What a Wonderful Few Days at the Garden!

Hey Everyone,

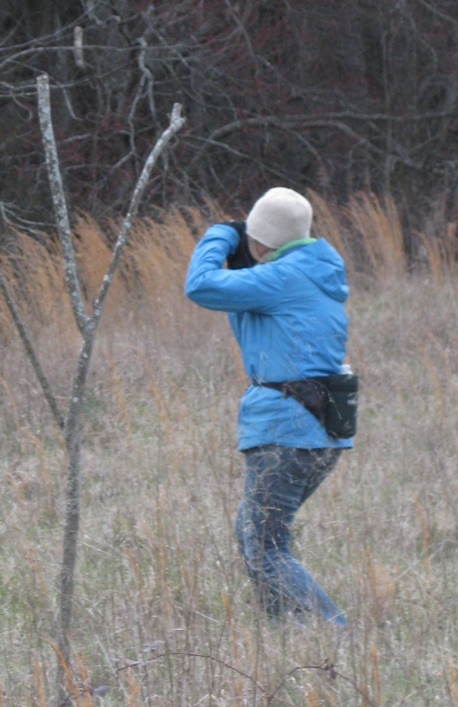
What a wonderful few days it has been at the garden.  So many have been out working on their beds, visiting, and volunteering their time.  We are rapidly becoming a wonderful community and it is such a pleasure to garden among each of you.  A special shout out to our young visitors on Friday.  Eli, Lily, and Josh all made my day so enjoyable and you are welcome to visit our garden anytime.  Thank you so much for helping our new gardeners prepare their bed and placing compost in Miss Nancy's bed.  She is very grateful for your help!  Eli, please keep me posted on your mantis egg case.  I cannot wait to see how they do for you.  Lily, I plan on releasing ladybugs in the garden within the next week or two and if you are down for helping, make sure I have your contact information and I will let you know when.  Maybe Miss Vicki will even help us!  Pretty Please, Miss Vicki?

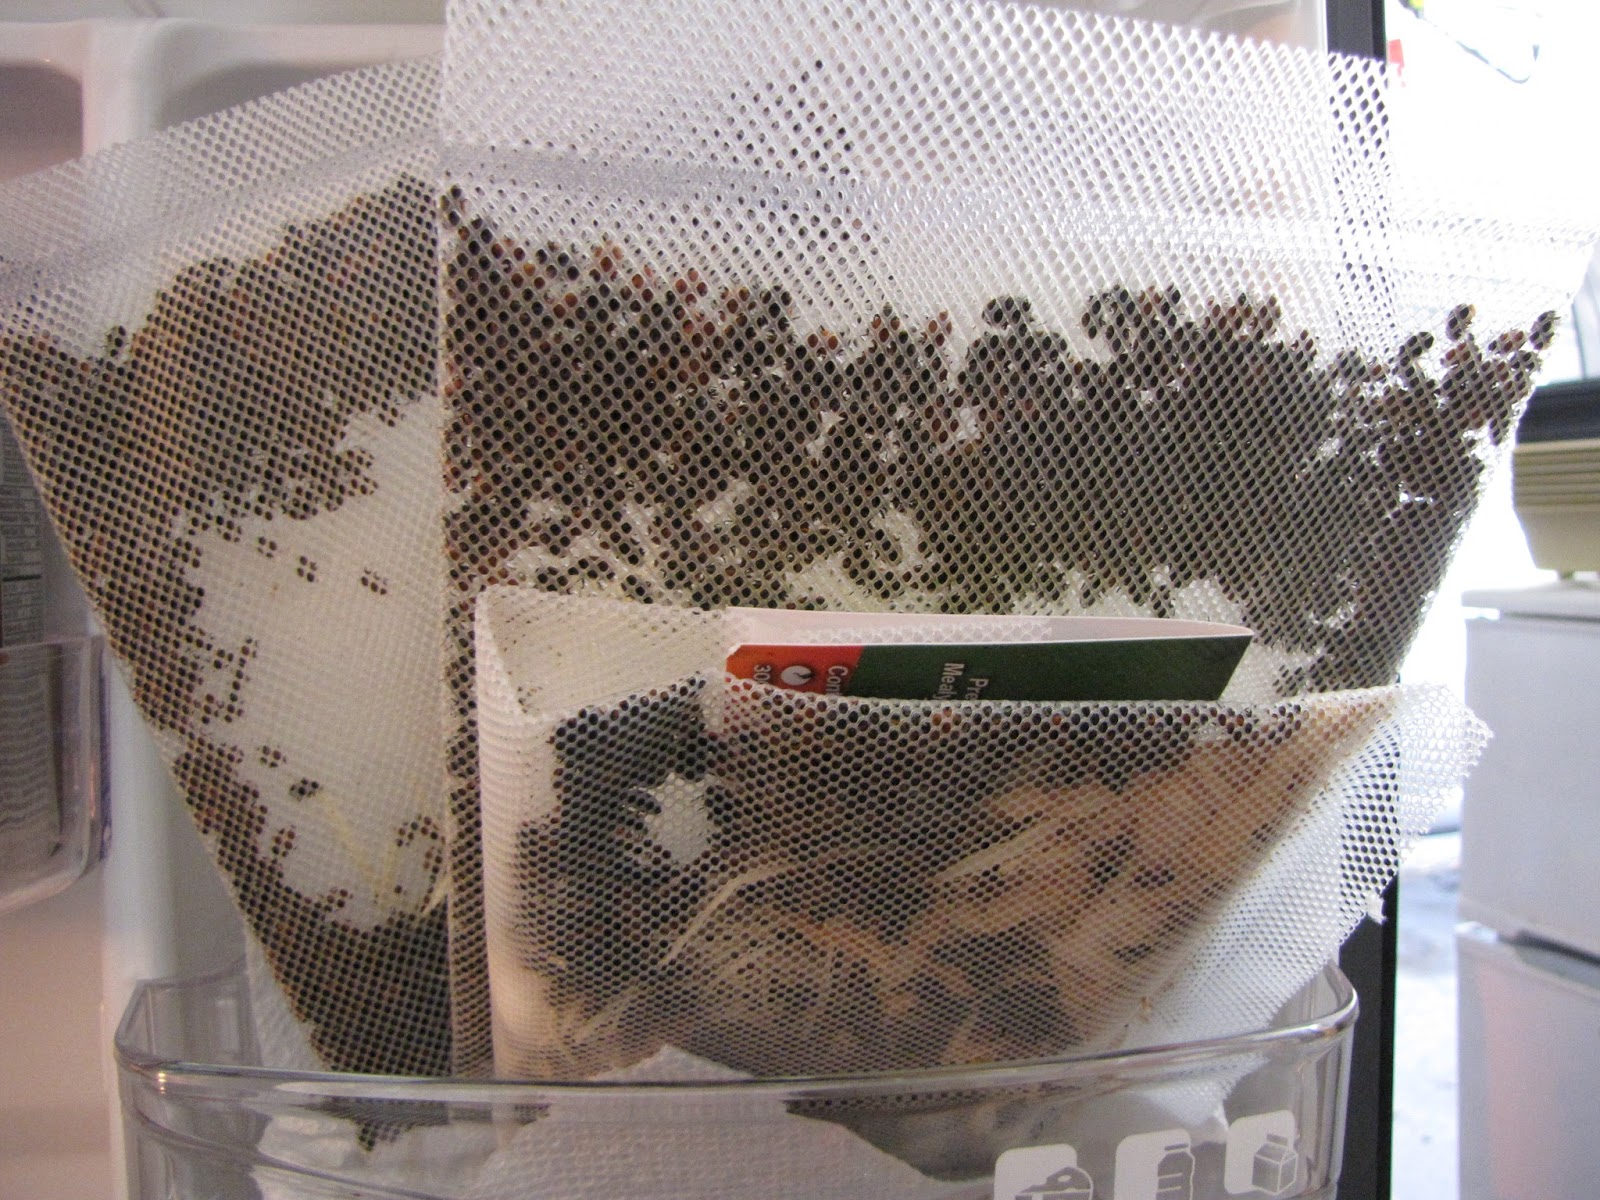
Yes, these are actually chillin'
in my fridge!
Yikes!

On a side note for gardeners - two items.


  • Just a friendly reminder to let everyone know that the shed and front gate have been found open on several occasions in the last couple of weeks.  If you are in the garden, please be sure and lock up.  It would also be nice to stroll by and check to be sure that the shed is locked in case someone else has forgotten.  Thanks so much for your help while we all get in the routine!      

Newly hatched mantis's on oregano!
These were Fred & Wilma
a few hours after birth!
They are in the lower right quadrant.

  • Part of gardening organically requires the utilization of beneficial insects in the garden to assist in keeping undesirable pests to a minimum.  Ladybugs are wonderful to have around as they feed on small soft-bodied insects with a voracious appetite.  The first release will be to assist us in building numbers before aphids arrive.  Subsequent releases will follow.  I also have praying mantis egg cases in incubation for future releases. If anyone has young children or grandchildren this is a wonderful way to have them involved and be a garden helper.  
        Bugs are cool!  


Have a great start to the week!

Denise, Beds 25 & 29

Friday, March 8, 2013

When is it Warm Enough to Plant?

Hey Everyone,

With the warmer days of spring just around the corner, everyone will be anxious and eager to get out and enjoy his or her garden.  I hope that many will want to try direct sowing some seeds.  I ran across this chart on the Gardener's Supply website and thought we would all appreciate the guidelines for soil temperature to ensure good germination rates.  Remember the green dots are far from optimum and will produce results that are more erratic.

The best temperatures for starting seeds
When is it Warm Enough to Plant?

To obtain the most success with direct sowing seed, it is important to follow a few simple steps.


Bed 50 is a wonderful example of
well worked soil with
a nice loam to it. 
  • Take the time to do a little garden prep work.  Thoroughly check your bed for the presence of any undesirables (grubs, cutworms, vine borer larvae, etc.).  Turn in plenty of soil amendments (free compost is available) and work the soil so it is a nice loose consistency with no heavy clumps of dirt. Fertilize properly and level the bed nice and neat. 
  • Look for the seasonal benchmark.  The best advice I ever received was to look for the sweet spot when planting.  This is a great weekend for prepping the soil and then letting the bed rest a few days to a week before sowing.  When turning your bed, you will be bringing the cooler soil to the top and it will take a few days to warm.  We can still have harsh weather and some young seedlings will easily succumb to the freezing temperatures.  Tip:  Unless you are using a frost blanket, it is still too early for sowing carrots, beets, turnips, and lettuce.  However, it is a perfect time for bulbing onions, peas, parsley, radishes, spinach, and mustard greens.  I will start taking soil temperatures this weekend and post them so we have an idea of where things stand.  Temps taken this afternoon ran approx. 37.3 to 41.6 degrees depending on where you were in the garden. Those who have consistently been covering were substantially higher by 10 to 12 degrees.

    Freshly watered soil with
    a desirable loam and consistency. 
  • Follow the seed packet instructions for the depth and spacing requirements.  Some seeds require light to germinate and if sown too deep will not sprout.  A nice rule of thumb is to sow no more than two to three times as deep as the seeds diameter.  However, if your packet states to barely cover the seeds, follow these instructions.   
  • Keep the seedbed evenly moist and do not let it dry out. Use a fine mist or shower nozzle to prevent dislodging of the seeds and eroding of the soil.  Tip: Nothing hinders the process more than allowing the seedbed to dry out during germination.  I actually try to mist my bed roughly the same time every day to ensure success.  
  • Make sure to know what your seedlings will look like and mark them properly.  Pull all competing spring weeds as they have the potential to harbor disease and insects as well as compete for your seedlings nutrients.  Once sprouted, gradually wean to your regular watering schedule, however, please remember raised beds do dry out rapidly and young seedlings need consistency. 
The attached sowing guides should get everyone off to a wonderful season of growing.  Devra at Botanical Interests has been kind enough to give me their permission to use these charts for our garden needs!  They have excellent recommendations for good germination rates of what is safe to put in now and what you should wait a bit on.  If I can be of any assistance, please don't hesitate to ask or post a comment.


Enjoy the wonderful weather this weekend!                                              

Denise, Beds 25 & 29

Weekly Calendar - March 8 - 15

March 8, 9, 10
Cobb County Library Book Sale
More information about the Book Sale

March 9
2:00 - 4:00 pm
Gardener on Duty

8:30 - 10:30 am
Fruit Tree Planting in the Orchard
See email sent on Mon 3/4/13 for more details

March 12
NO Gardener on Duty

How to keep your Veggies Happy, Healthy and Productive
6:30 - 7:30
Class on watering, fertilizing and mulching
Class Details on the blog

March 14
9:30 am
Monthly Planning Meeting
Christ Lutheran Church, 176 West Sandtown Road Marietta, 30064

All gardeners at the Green Meadows Community Garden are invited to attend the Planning Meeting. You have a vested interest in the day to day operation and the future of the garden.

Thursday, March 7, 2013

Eggs, Calcium and Pinterest

The relationship between eggs and calcium is clear but how does Pinterest come in to play

And then the next question is - what IS Pinterest?

Pinterest is a really cool way to organize information you find online but don't really want to print. If you just save a file on your home computer, the chances of finding it when you need it aren't that good. Or at least not easily. Pinterest works like an online bulletin board and "pins" what you find on a virtual bulletin board using pictures with descriptions.

If you have heard of Pinterest you may think, oh, it is just for recipes, crafty projects, home decor, etc. Not true! Over the last few months I've used it frequently to find gardening information about row covers, square foot gardening, trellis options, community gardens, growing lettuce indoors, carrots, potatoes, etc. There is a wealth of information out there to find and looking at Pinterest sparks ideas and AH HA! moments.

As always, remember that not everything you find is true so verify before you totally believe it. There are a number of old, unscientific ideas that have been pinned.

One thing I came across on Pinterest (and pinned to save it) recommended saving the water you boil eggs in and using it on your plants because calcium leaches out of the egg shells. I didn't really know whether to believe it or not but said what the heck, I'll try it.

pHydrion tape is used to measure the acidity of fluids. I tested a glass of fresh tap water and a glass full of egg water. The egg water really did have more calcium! (The dark green tape is the egg water.)

 Guess I'll save my egg water and use it on plants that really need it. I could always take it to the garden and put it on my tomato plants to help prevent blossom end rot.

Calcium is essential for all plants, but the following are especially responsive: apples, broccoli, brussels sprouts, cabbage, carrots, cauliflower, celery, curcurbits, legumes, lettuce, peppers, potatoes,  and tomatoes. This link has a lot of interesting information: Plants Need Calcium Too

Wednesday, March 6, 2013

Welcome to the Shed

Everyone should have the code to the lock on the shed door by now. If you haven't been inside, there are all kinds of useful tools in there. As well as a First Aid Kit which we hope no one will need to use. There may be other things you would like to use like a Bad Bug Kit, paper, pens, etc.


Please put everything back in a neat manner and if you track dirt or wood chips in, sweep them out.  We do have a very nice broom to go along with the great tools and kneelers!

If you have plastic grocery bags you need to recycle, we have a huge pink bag that needs more bags. It is so nice to have access to bag when you need it!

Tuesday, March 5, 2013

Bluebird Trail Tour in the Snow


Snow?  Yes indeed it snowed on us at the garden during the Bluebird Trail Tour! Maybe we should have called it the Snow Bird Tour. At one point Jim called out "It is snowing!" and when we looked, he was rather blurry it was snowing so hard.

But that didn't keep this hardy bunch of people from bundling up and spending time in the garden and walking the trails.

It was colder standing in the garden with the wind whipping around us then it was once we started walking. 

I was impressed that everyone had a hat of some kind on!
Kathy was stalking a bluebird at one feeder, trying to get pictures for Jim's blog.

Cobb County Book Sale

The Cobb County Library and The Friends of the Library are hosting their semi-annual book sale at Jim Miller Park from March 8-10, 2013. Over 100,000 items are for sale at the event which takes place in the spring and fall for three days beginning on Friday. Sale items include books both hardbound and paperback for children, young adults and adults; audio-visuals including books on tape and compact disc; videocassettes; compact discs; records; magazines; and comic books. All proceeds are used to purchase new books and other library materials.

Date:
March 8-10, 2013

Time:
Friday - 9am to 5pm
Saturday - 9am to 5pm
Sunday - 1pm to 5pm
 

Prices
Books, Magazines, Videos, Records, CDs, and More!
Hardbacks – Adult $1.50
Hardbacks – Juvenile   $1.00
Paperbacks – Select (i.e. Travel & Computer) $1.00
Paperbacks - Large Format $1.00
Paperbacks – Mass Market Size 50¢
Paperbacks – Juvenile  50¢
Reader’s Digest Condensed Books 25¢
Harlequin & Silhouette Romances  50¢
Magazines 10¢
Comic Books $1.00
Puzzles, Records, Audio & Videocassettes, & Computer Programs $1.00
Magazines by the Box $2.00

Address:
Jim Miller Park
2245 Callaway Road
Marietta, GA 30008

Monday, March 4, 2013

How to keep your Veggies Happy, Healthy and Productive

Tuesday March 12, 2013
6:30 - 7:30 pm
Lost Mountain Park
Western District Operations Building

You are invited to attend a free gardening class sponsored by The Green Meadows Preserve Community Garden.

How to Keep your Vegetable plants Happy, Healthy and Productive

Come learn more about the Three Bears Scale -
       Too Much,  Not Enough and Just Right

See how it applies to:
  • Fertilization
  • Watering
  • Mulching

Please RSVP to greenmeadowscg@gmail.com
We want to make sure we have enough handouts for everyone.

Directions From the Community Garden:
Take Dallas Hwy West 2.0 miles (to the 2nd traffic light from the garden.)
Turn left at the traffic light into Lost Mountain Park . 
Take the first left.
Once you turn, go straight and the road dead ends into a parking lot between Boots Ward Recreation Building and the Western District Operations Building. If the parking lot is full, park in the parking lot in front of the ball fields.

Lost Mountain Park
Western District Operations Building
4845 Dallas Highway
Powder Springs, GA 30127

Green Weed Prevention

Now is the time to really jump on the weeds around your bed and in the community areas. We've been working on it but there is more to be done.

True, weeding isn't very exciting but it is even less interesting when you have double the amount of weeds to pull.  My philosophy has always been -while the ground is soft, pull them out. There are kneelers on the wall in the shed and great tools to help with the chore.

One way to prevent weeds from sprouting up around your beds is to rake back the mulch and spread newspaper on the ground. Once the paper is down, put the mulch back over the newspaper. This really does help, especially while our mulch is thin.


There are two piles of newspaper in the corner of the shed that can be used to do this. Or you can bring the newspaper you were planning on recycling and use it around your bed.

Unfortunately this won't do away with the onions - the only way to get rid of them is to dig them out. Each and every time you see one.


Potato Totes & Bags


The Potato Planting Demonstration on Saturday Feb 23rd was a great success.  Everyone got to participate in cutting the potatoes and planting them.

 
Mike had a very intent audience as he showed examples of good potatoes and bad potatoes.


What are they looking so hard at?  Maybe the potatoes were escaping - that might explain all the laughter in this picture.

Two methods (bag & tote) were extremely easy and fast to do. The bag came from Gardener Supply as a Potato Bag Kit  which contains a potato bag, 3 bags of soil mix and fertilizer. (You have to buy your own potatoes.)                       


The basics were the same for using the potato bag and the tote. Put a 2-3 inch layer of organic material in the bottom, put in the seed potatoes, cover with another 2 inches or so of organic matter, fertilize and water in well.

Wait until the potatoes begin growing and when the sprouts are 4 inches or so tall, put dirt around the stems (but leave some green leaves sticking out), water and wait some more.

Repeat this procedure until the top of the container is reached. Potatoes will form all along the stem that is buried in dirt. If you want to read more about  Growing potatoes in containers, this is a good link.

The tote is a super size plastic bin (18 gallons or more). Because it is solid plastic, you need to punch lots of holes in the bottom and along the outside edge to provide drainage.  Once the holes are punched, fill with soil and potatoes.


It will be interesting to see which produces the most potatoes - the tote or the bag.

We also constructed a potato tower but that will have to be in a separate post!

Sunday, March 3, 2013

Cold is for the Birds


Cold is for the birds ... and for those who need a challenge.  I'm reading Theodore Roosevelt's biography and he loved to stalk wildlife and KILL IT !  Like Teddy, I love to stalk wildlife, too, but only for the thrill of the capture ... on "film" ... with a lens someone gave me a long time ago when I didn't know what the heck it was.  It's a mirror lens, not built for a digital camera but it works with a digital camera, nothing automatic about it and it mimics having a long, long, long telephoto lens though that's not what it is.  These were my first attempts to use it - couldn't wait for the near-60 deg heat wave we'll have  tomorrow, Monday, the 4th.  Might set up a chair on the bluebird trail and see what I can "catch".  What's the bird in the bottom pic?

A Different Carrot Top Arrangement

So here is the 4th arrangement I've made with Carrot Tops. I'm really going to have to grow tons of carrots this spring and summer just so I can have the green leaves for arrangements. Maybe I'll try very short ones in containers at home even though I don't have enough sun to grow much of anything. After all, I just want the tops, right?

Saturday, March 2, 2013

Bluebird Trail Tour is STILL on at 4:00 Saturday

Hello Everyone,
   The Bluebird Trail Tour scheduled for 4:00 this Saturday afternoon is STILL ON! There will be hot cider to warm you up as well as other goodies.

Walking the trail through the woods will be protect you from the wind. Just bundle up and it won't be bad since you'll be moving.

See you there for the walk!

As for the Workday - I'll be there at 2:00 to help change the lock combinations but the only thing on the workday agenda is weeding. If you'd rather weed when the weather is nicer this week, feel free to do your weeding later in the week. It is pretty nasty for just weeding. Brrrr....

If you have to choose between the Bluebird Trail Tour and weeding at the workday, pick the Bluebird Trail Tour!

         Vicki

Friday, March 1, 2013

Weekly Calendar March 1 - March 9

March 1
Reminder
Combination Lock Change
Be sure you have the new one

March 2
If in doubt, check blog at 1:00 for any weather delays
2:00 - 4:00 pm
Saturday Workday

Putting in rebar for bluebird house

4:00 - 5:00
Bluebird Trail Tour
Bluebird Trail Tour

March 5
4:00 - 5:30
Gardeners on Duty

March 9
2:00 - 4:00
Gardeners on Duty

Possible Tree Planting in the morning
Watch Blog for more details

Thursday, February 28, 2013

Keeping the shed clean

I noticed over the past few weeks that we are using the tools more and more in the big red shed. To help in keeping the dust and dirt to a minimum in the barn we should be cleaning the tools after each use before we hang them back on their hooks.

We have a spigot to the left of the door and if you will spray some of the water into the compost bin that would be accomplishing two tasks. So in short please take the effort to clean as we go. Thanks.

Hooray - the new hoses are installed

Today was a most excellent workday. We got the pile of dirt moved into all the new beds plus topped off a few other beds. Weeding took place, the compost was turned and even more exciting is that the 4 new hoses got installed. Those dratted green ones have been replaced!! Hip hip hooray! Everyone now has access to wonderful hoses.

 
The Bluebird Trail Tour was a great success as well. Kitty and Kathy (KC) both brought blueberry muffins. Soooo delicious!  Jim's talk and tour was very interesting and provided great information. The sun even came out while we were out walking to make it nicer.
 

If you weren't able to come to the Thursday workday and Bluebird Trail Tour, be sure and come out on Saturday.

        (If you are in doubt weather wise, check the blog and an update will be posted by 1:00 pm)

Count the Grubs

If you are thinking maybe you are going to skip turning the soil in your bed before you plant this spring, think again! As the two pictures demonstrate, you really SHOULD turn your soil to look for grubs.  Rita completely turned the soil in one bed during the workday and this is what she found.

 All these grubs came out of one bed!
How many grubs can you see in here?
(Don't count the brown mealworms.)
 

A close up of the grubs. Noticed they range in size
 from big fat ones to small white ones.

Freeze Warning(s)

There is a Freeze warning out for Thursday night. More than likely there will be a freeze warning for Fri (low 30), Sat (low 27) and Sun (low 25) nights as well.

Protect your carrots!

Monday, February 25, 2013

Collard Greens with Roasted Kabocha Squash & Coconut

And for those of you that don't think I am completely off my rocker, this will be my next attempt at having collards with coconut.  I so love trying something new utilizing what I grow!  I ran across this recipe on Peas and Thank You by Mama Pea.  If anyone would like to grow Buttercup Squash or Kabocha, I do have a few extra seeds. 

A sweet buttercup squash, creamy coconut milk, collards, and toasted coconut, who would have guessed?  

Ingredients:  Recipe makes 2 entree servings or 4 sides


1 1/2 cups kabocha squash, peeled and cubed (can substitute butternut squash or sweet potatoes)
1-2 tablespoons coconut oil, melted and divided
IMG_7995
Yummy!
coarse ground sea salt and pepper
1 small sweet onion, chopped
1 bunch collard greens, cleaned, trimmed from stem and chopped
1 can coconut milk (full or reduced fat)
1 tablespoon tamari or soy sauce
1-2 teaspoons brown sugar or maple syrup (optional)
1/2 teaspoon freshly grated nutmeg
2 tablespoons unsweetened coconut, toasted

Instructions:

Preheat oven to 325 degrees.  Arrange coconut in a single layer on a baking sheet.  Place on the center rack and bake approximately 12 minutes.  Remove the toasted coconut from the baking sheet to cool in order to avoid over cooking.  

Raise oven temperature to 425 degrees.


Toss peeled and cubed squash with a pat of coconut oil and place on a baking sheet.  Season to taste with salt and pepper.  Roast for 20 - 25 minutes, stirring at least once halfway through.


Place a deep skillet or pot over medium high heat and add remaining coconut oil. Sauté onion until starting to soften and brown, about 4-5 minutes. Add collard greens that have been trimmed from the stem and cut into 1 x 2 inch strips. Toss to coat with coconut oil, adding slightly more if necessary.

Pour in coconut milk, tamari or soy sauce, brown sugar or maple syrup, if using, and nutmeg.

Bring to a low boil, then lower heat and simmer for 15-20 minutes, or until greens have softened but are still vibrant.  Season with salt and pepper to taste.

IMG_7973
Now that's Collard's!
Add roasted squash to greens and place in a serving dish.

Top with toasted coconut.

Hope you enjoy! 

Denise, Beds 25 & 29

Sunday, February 24, 2013

Bad Grub Kit

No...we aren't giving out bad grubs. Instead I'll show you my favorite Catch A Bad Grub/Bug method.

What you Need:
1 pair of hands
1 or 2 newspaper bags (or gloves if they are handy)
1 plastic container with a lid
Some bad critters

Put the newspaper bag on one or both of your hands
if you can't stand to touch the bad critters.

Reach for the critter you don't like

Put the bad critter in the container that has a lid

Put a lid on the container so the critter doesn't
escape when you aren't looking

Take the critters home and freeze them to kill them. Or put them in a blue bird feeder so the birds will eat them. I personally like the bluebird feeder by the birdbath because more birds go to it and the bugs get eaten faster.
 
Just keep an empty container stuffed with several empty newspaper bags in your "go the garden" work bag and you'll never find you don't have something to pick the bad critters up with. Or worse yet, let them escape you after you picked them up.