Thursday, February 28, 2013

Keeping the shed clean

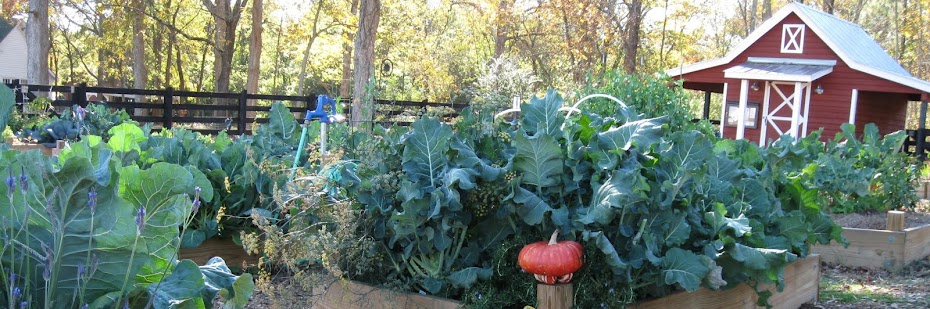
I noticed over the past few weeks that we are using the tools more and more in the big red shed. To help in keeping the dust and dirt to a minimum in the barn we should be cleaning the tools after each use before we hang them back on their hooks.

We have a spigot to the left of the door and if you will spray some of the water into the compost bin that would be accomplishing two tasks. So in short please take the effort to clean as we go. Thanks.

Hooray - the new hoses are installed

Today was a most excellent workday. We got the pile of dirt moved into all the new beds plus topped off a few other beds. Weeding took place, the compost was turned and even more exciting is that the 4 new hoses got installed. Those dratted green ones have been replaced!! Hip hip hooray! Everyone now has access to wonderful hoses.

 
The Bluebird Trail Tour was a great success as well. Kitty and Kathy (KC) both brought blueberry muffins. Soooo delicious!  Jim's talk and tour was very interesting and provided great information. The sun even came out while we were out walking to make it nicer.
 

If you weren't able to come to the Thursday workday and Bluebird Trail Tour, be sure and come out on Saturday.

        (If you are in doubt weather wise, check the blog and an update will be posted by 1:00 pm)

Count the Grubs

If you are thinking maybe you are going to skip turning the soil in your bed before you plant this spring, think again! As the two pictures demonstrate, you really SHOULD turn your soil to look for grubs.  Rita completely turned the soil in one bed during the workday and this is what she found.

 All these grubs came out of one bed!
How many grubs can you see in here?
(Don't count the brown mealworms.)
 

A close up of the grubs. Noticed they range in size
 from big fat ones to small white ones.

Freeze Warning(s)

There is a Freeze warning out for Thursday night. More than likely there will be a freeze warning for Fri (low 30), Sat (low 27) and Sun (low 25) nights as well.

Protect your carrots!

Monday, February 25, 2013

Collard Greens with Roasted Kabocha Squash & Coconut

And for those of you that don't think I am completely off my rocker, this will be my next attempt at having collards with coconut.  I so love trying something new utilizing what I grow!  I ran across this recipe on Peas and Thank You by Mama Pea.  If anyone would like to grow Buttercup Squash or Kabocha, I do have a few extra seeds. 

A sweet buttercup squash, creamy coconut milk, collards, and toasted coconut, who would have guessed?  

Ingredients:  Recipe makes 2 entree servings or 4 sides


1 1/2 cups kabocha squash, peeled and cubed (can substitute butternut squash or sweet potatoes)
1-2 tablespoons coconut oil, melted and divided
IMG_7995
Yummy!
coarse ground sea salt and pepper
1 small sweet onion, chopped
1 bunch collard greens, cleaned, trimmed from stem and chopped
1 can coconut milk (full or reduced fat)
1 tablespoon tamari or soy sauce
1-2 teaspoons brown sugar or maple syrup (optional)
1/2 teaspoon freshly grated nutmeg
2 tablespoons unsweetened coconut, toasted

Instructions:

Preheat oven to 325 degrees.  Arrange coconut in a single layer on a baking sheet.  Place on the center rack and bake approximately 12 minutes.  Remove the toasted coconut from the baking sheet to cool in order to avoid over cooking.  

Raise oven temperature to 425 degrees.


Toss peeled and cubed squash with a pat of coconut oil and place on a baking sheet.  Season to taste with salt and pepper.  Roast for 20 - 25 minutes, stirring at least once halfway through.


Place a deep skillet or pot over medium high heat and add remaining coconut oil. Sauté onion until starting to soften and brown, about 4-5 minutes. Add collard greens that have been trimmed from the stem and cut into 1 x 2 inch strips. Toss to coat with coconut oil, adding slightly more if necessary.

Pour in coconut milk, tamari or soy sauce, brown sugar or maple syrup, if using, and nutmeg.

Bring to a low boil, then lower heat and simmer for 15-20 minutes, or until greens have softened but are still vibrant.  Season with salt and pepper to taste.

IMG_7973
Now that's Collard's!
Add roasted squash to greens and place in a serving dish.

Top with toasted coconut.

Hope you enjoy! 

Denise, Beds 25 & 29

Sunday, February 24, 2013

Bad Grub Kit

No...we aren't giving out bad grubs. Instead I'll show you my favorite Catch A Bad Grub/Bug method.

What you Need:
1 pair of hands
1 or 2 newspaper bags (or gloves if they are handy)
1 plastic container with a lid
Some bad critters

Put the newspaper bag on one or both of your hands
if you can't stand to touch the bad critters.

Reach for the critter you don't like

Put the bad critter in the container that has a lid

Put a lid on the container so the critter doesn't
escape when you aren't looking

Take the critters home and freeze them to kill them. Or put them in a blue bird feeder so the birds will eat them. I personally like the bluebird feeder by the birdbath because more birds go to it and the bugs get eaten faster.
 
Just keep an empty container stuffed with several empty newspaper bags in your "go the garden" work bag and you'll never find you don't have something to pick the bad critters up with. Or worse yet, let them escape you after you picked them up.

Welcome New Gardeners


Welcome to all the New Gardener's for 2013! Sunday afternoon was a gorgeous afternoon to spend at the garden getting oriented and meeting some of the current gardeners.

Don't hesitate to ask questions - someone will know or find the answer. I'm still asking lots of questions myself. In fact, I don't know any gardener that knows everything!

I know there are several new gardeners not pictured but don't worry, sooner or later, your moment of fame will come when I ask you to help me stage a photograph for the blog.

Change to Combination Locks

On March 1st ALL the combinations will change so that all the locks for the gates, water faucets and the shed will have the same combination.

 
NO, this is NOT the new combination
 
Be sure to scramble the combination each time you relock any of the locks. Yes, you have to move the tumblers more but it means that the lock won't accidentally slide open after you leave the garden. And yes, this has happened a number of times.

If you don't have the new combination or have forgotten what it will be, be sure and email Carol before March 1st.

Saturday, February 23, 2013

The Three Bear's Scale

The Gardening version of the tale of Goldilocks and the Three Bears:

You can have too much soil, not enough soil and just the right amount of soil in your bed.

TOO much soil in the bed means any rain that comes down will just run off and not sink in. Plus, where will you put the extra dirt when you dig holes to plant your veggies. (No one at the garden has this problem at the moment.)

NOT enough soil in your bed means there isn't enough to keep the roots of your plants healthy and happy. The bed in the picture below definitely doesn't have enough soil in it and needs to be brought up pronto.

The best way to bring up your soil level is to amend it with organic matter BEFORE you plant any of your spring vegetables. Any kind of composted material is excellent. You can buy composted manure, mushroom compost, etc or if you have leaves that have composted that works as well. The more organic matter you amend your bed with, the better your vegetables will grow.
 

Incorporating composted material is the key at this time of year. Don't use "fresh" leaves, grass etc. You don't want to tie the nitrogen up right before you put in plants. Chuck put a layer of chopped up leaves on top of his bed in the fall and by the time he plants his spring crop, most of the leaves will have decomposed and enriched the soil.

Not enough soil in the bed

JUST the right amount of soil means the water won't run off and instead will soak into the soil. Also, all your plants will have plenty of space for their roots and will be happy to grow.

JUST the right amount.


Grubs in the Garden

Dalita has been thoroughly turning, amending and refreshing her garden bed to prepare it for spring planting. She has found quite a few grubs like the ones in this picture. I know it is easier to just fluff a little and then plant the new plants but these are undesirable grubs and need to come out.

There are two ways you can fluff your bed - with a shovel or digging fork while the dirt/soil stays in the bed or by putting a tarp down and taking all the soil out and then putting it back in.

While you are fluffing your soil, be sure and watch for all the pecans the squirrels planted this fall. If you don't remove the pecans now, you'll be removing baby pecan trees all spring and summer.

The BEST way to remove the grubs is by hand picking. If you use Sevin you will kill all your good bugs and critters like the earthworms which have hopefully started moving into your bed. Sevin is not organic at all and kills everything.

                  Thanks Dalita for sending me this picture to share with everyone.

Friday, February 22, 2013

Weekly Calendar: Feb 23 - Mar 2

Feb 23
2:00 pm
How to plant seed potatoes
Mike (Bed #30) will demonstrate different methods of planting seed potatoes. We'll be able to watch the potatoes grow all spring in our experimental area at the garden and see which method was most productive
 
Feb 24
2:30 pm
New Gardener Orientation

Feb 26
4:00 - 5:30 pm
Gardeners on Duty

Feb 28
10:00 am - 12:00
Thursday Monthly Workday

12:00 -1:30
Bluebird Trail Tour
Bluebird Trail Tour Announcement

March 1
Lock combination changes
Be sure you have it before you come to the garden!

March 2
2:00 - 4:00
Saturday Monthly Workday

4:00 to 5:30
Bluebird Trail Tour
Bluebird Trail Tour Announcement

Cobb 4-H Plant Sale

Still opportunity to support Cobb County 4-H Club plant sale
Cobb County 4-H Club is having its annual plant sale and prepaid orders will be accepted through Friday, March 8. This year’s assortment includes blackberries, blueberries, raspberries, figs, muscadines, Admiral Semmes azalea, crape myrtles, edgeworthia, heuchera, forsythia, viburnum and loropetalum.
 
The order form is available at  Cobb County Extension or by calling 770-528-4076. Plants may be picked up at Jim Miller Park on Saturday, March 16 (one day only) from 9 a.m. to 3 p.m.
 
A free seminar on growing and caring for blueberries, blackberries, raspberries and muscadines will be presented 6:30-8 p.m., Monday, March 4, at the Cobb County Water Lab, 662 South Cobb Drive , Marietta. Registration is required. For more information, visit Cobb County Extension or call 770-528-4070.

Thursday, February 21, 2013

Carlos Montano's link to Christine Sibley


A previous post on this blog centers around a trip several of us Green Meadows gardeners made this week to Carlos Montano's garden art studio in Fairburn GA.  When I first visited his studio several months ago, an idea haunted me that I'd seen similar pieces somewhere before ... but where?  After rolling through my mental rolodex, an Aha! idea struck me that there were faces at an Atlanta Botanical Garden pool very, very similar to what I was seeing at Carlos'.  I was right!  Carlos explained that the mural and faces were Christine Sibley's art.  He was connected to her as a manager in Christine Sibley's own studio.  He knew just which faces at the Bot Garden pool that I was asking about.  In fact, he had been commissioned by the Garden to 'fix' the deteriorating pieces as he had the molds Christine had used to make the originals.


So I visited the Atlanta Botannical Garden the day before a second visit to Carlos' yesterday.  The pieces had been restored and looked wonderfully original!  The link below provides photos of Carlos as well as other artists who have reproduced Sibley's art.
 
http://projects.ajc.com/gallery/view/living/0424sibley/

Pilgrimage to Carlos Montano's Studio


In alphabetial order Bridget, Carol, Kitty, Lisa, Mike and Rita made another pilgrimage yesterday to Carlos Montano's showroom/studio and, of course, came back with more garden art and less $.  Having given us fair discounts, I think I speak for the group that it was worth the trip.  Wish I'd paid more attention to who bought what because all pieces will be thought of as prized possessions once established in their rightful gardens.  But 'The Book' wins the Most Outstanding Purchase, 'St. Francis' wins the Most Calming, 'The Plaque' wins the Most Wise, and the 'Stepping Stones' order wins the Most Practical.  'Sunflower Feeder' (shown here) wins a second place Most Practical award.  To see more of Carlos' artwork, visit http://casamontanogardenornaments.com/ .  Be sure to check out the Sibley page on his website.  There's a close connection between the Atlanta artist Christine Sibley and Carlos which makes for a great story coming soon to a blog near you.

Wednesday, February 20, 2013

Tree Planting has been Cancelled

 
Unfortunately the Tree Planting for the Orchard will NOT take place this Saturday. The weather conditions on Friday aren't right for digging holes. If the holes were dug, they would be swimming holes which the baby trees wouldn't like. Watch the blog for an announcement of when the tree planting will be rescheduled.


Tuesday, February 19, 2013

Potato Planting Demonstration

When: Saturday February 23

Time:  2:00 pm

Place: The Garden

What: Mike will be demonstrating 4 different methods of planting and growing potatoes.  We'll be able to watch how they grow all season and then feast on them when they are ready to eat. It will be interesting to see which method yields the most.

   If the weather looks iffy, check the blog as a note will be posted Saturday by 1:00 pm
 
  The rain date will be Sunday February 24 at 1:30 pm

How to Chit Potatoes

 
You can see the exposed cut skin drying out in
one hour. Put the chitted potatoes in a cool dark
at this point! A garage works like a root cellar this
time of year
What is chitting you say?

Chitting simply means getting the potatoes off to a good start by getting the sprouts to start growing before planting them. Home potato growers chit to increase the yield and quality of their potatoes.
 
Seed potato tubers need “chitting” before planting but if you don’t have time to do this, don’t worry. The potatoes will still grow but they will take several more weeks to mature. 

Start the chitting process about 6 weeks before you intend to plant. To do this you need to place them in seed trays, egg boxes or something similar in a cool well lighted place. Make sure you put the seed potato rose end up (the blunt end with the most shoots or ‘eyes’). After a while they will start shooting out new growing shoots. Once these are 1”- 4” long they can be planted out. This process is more important when planting early varieties of potato.

Planting times vary depending on when the last frosts are expected and potatoes need to be planted no earlier than about 6 weeks before this. Potato varieties are classed into three types: 1stEarly, 2nd Early and Main Crop. (These terms refer to the time from sowing to harvesting only.)
  • Start the 1st Earlies in Mid to late February. 1st Early are ready in around 10 weeks
  • Start 2nd Earlies in March/April. 2nd Early are ready in about 13 weeks
  • Main Crop potatoes are planted a couple of weeks later. Main Crop potatoes are ready after 20 weeks or so. 
 Here are two ways you can grow your chitted potatoes once they are ready to be planted out.

  1. Use a plastic container (with a lid). The lid is important because if the weather gets cold, you can just put the lid over the green potato leaves to keep them from being burned.
  2. Or use a store bought potato growing bag. 
To turn this plastic container into a potato growing tote,
make holes two inches from the bottom for drainage.


Store bought potato growing bag


      Pictures and information provided by Mike


What to look for in Seed Potatoes & How to store Them


Healthy seed potato

Q:  Which potato should you choose to start your potato crop with - special seed potatoes or grocery store potatoes.

A:  Potatoes are best grown using specially grown seed potatoes. The most important reason to use seed potatoes is that they have not had an inhibitor applied to them.

That isn't to say you can't use potatoes from the grocery store. However, they usually have had an inhibitor applied to stop them sending out their “chits” (growing shoots).

Grocery store potato - notice the
 purple/black eyes.These are not healthy.

Because of the inhibitor applied, grocery store potatoes frequently have unhealthy looking eyes. As well, the inhibitor causes growth to be stunted and production is reduced by 50 to 100%.
Use 4 inch pots with crumpled paper
 in the bottom to store seed potatoes


Use an egg carton to store seed potatoes


Once you have purchased your seed potatoes, you need to store them so they don't get moldy.

Putting them in a bag in the dark is not the way to go. You want air around each potato so they don't touch and become moldy.

Put each potato in its own "room" so there is air around each potato and the eyes don't get squashed.

Be sure and put them rose end up (blunt end with the most eyes).

Two easy (and cheap) ways of storing the seed potatoes - use an egg carton or 4" pots that plants came in.


  Pictures and information provided by Mike


Monday, February 18, 2013

Another Lost & Found item

A new item has appeared in the Lost & Found box...a pair of eyeglasses. If you are missing a pair, they are in/on the green Lost & Found box in the shed.


Lost Glasses

Hey everyone,

Was at the garden uncovering my bed this morning and found a pair of glasses between my beds.  I put them in the shed on top of the lost and found box.

Have a great day,

Denise, Beds 25 & 29

Yellow Sticky Traps are in!

Mike and Denise have yellow sticky traps set up in their beds already. The traps help you monitor what pests are prevalent. In other words,  they give you an early heads up that you are about to have a problem before it becomes a huge problem.

Denise has found all kinds of interesting critters stuck in hers. There is a great insect book in the shed in the book box that will help you ID what you have caught.

How do you use them you say?
  You need:
   1 yellow Sticky Trap
   1 Binder Clip
   1 twistie, zip tie or cable tie to run through the top of the binder clip and then tie to your plant stake.
   1 plant stake to clip the sticky trap to.
    You can get small plant stakes from Lowe's, Home Depot, etc. to clip them to. (To find them, just look in the garden department in the trellis area). Or use whatever you have handy at home or is already in your bed at the garden.
  Per Denise, you want the trap to hang slightly above the leaves of the plants but not where it can catch the leaves if the wind blows. She also says that as the plants grow, you will need to move the sticky trap higher so it is above the leaves again.

Go in the shed and look for the box that says "Yellow Sticky Traps".

Open the box and find the open package of sticky traps.
Pull out one trap and one binder clip. 

Each side of the sticky trap has a slick white
 paper covering the sticky bits.

But before you pull both sticky bits off, attach the
 binder clip to the end that isn't sticky.
 
It would have been much easier to use a twistie to tie the binder
 clip to the plant stake because my first try caused the
 sticky trap to fall out and get dirt on it
 
 Words of Warning: 
Once you have your stake in place, clip the sticky trap to it.
THEN pull the white paper off both sides.
 
Failure to do that means you most likely will have the sticky trap stuck to something you don't want it to. See above where I got dirt in it.
 
Second word of warning - put the trap in a location you are not likely to lean into. It is a bear getting the sticky stuff out of your hair! (Yes, I've done that too.)
 

Sunday, February 17, 2013

Birds at the Garden

The weather was quite frightful but the birds were most delightful.  That sums up my quick venture up to the garden to count birds for the Great Backyard Bird Count.

Two goldfinches and a white-breasted nuthatch

I've been keeping a casual list of birds I've seen on my visits to the garden and had managed to accumulate 28 species for my Green Meadows Bird List.  If I'd been taking binoculars to the garden to specifically look for birds I'd have a much longer list! In just one hour of standing near the shed and looking through the binoculars,  I managed to add 4 more species.

The shed makes a great place to stand and watch birds for two reasons: it acts as a bird blind and as shelter from the brutal wind. Saturday, anything that protected us from the wind was greatly appreciated!


What is a bird blind you say?
Any thing that keeps the birds from being aware of you. Examples: a car, the house, the over hang of the shed or a specific shelter built for watching birds.

Kitty was at the garden to do Garden Duty but there weren't any crazy gardeners out Saturday afternoon so she joined me looking for birds.  As you can tell from her smile she was having fun even if she was freezing.

Two frozen gardeners (Mike and Sue) stopped by after they finished their walk but they didn't stay long!


Saturday, February 16, 2013

Question for all readers

Hey Blog Readers
  Mike told me that when he looks at the Seed Potato post the picture is in the post sideways. When I look at it with my desk top computer it looks like it got published correctly.

So my question(s) are...

How many of you see the picture in the seed potato post sideways?

If you do see it sideways what kind of device are you using (iPad, iPhone, desktop, etc).


Have you noticed anything else sideways or catty wampus?
 
I know that sometimes it all depends on the device being used but I will try to fix any boo boo's that occur. Please let me know if you ever notice anything not "right".


Besides the garden ghost.


Friday, February 15, 2013

Weekly Calendar: Feb 16 - Feb 24

Feb 19
4:00 to 5:30 pm
Gardeners on Duty

Feb 20
Meet at 8:45 am at the Garden
Field trip to Casa Montano
Carlos Montano Garden Field Trip Announcement
email Carol by Monday if you are going

Feb 21
3:00 pm
New Gardener Orientation

Feb 23
2:00 - 4:00 pm
Gardeners on Duty

How to plant seed potatoes
Time TBA via blog posting
Mike (Bed #30) will demonstrate different methods of planting seed potatoes. We'll be able to watch the potatoes grow all spring in our experimental area at the garden and see which method was most productive
               
Orchard Planting with Keep Cobb Beautiful
Blog Post to come with time and further details
Planting of fruit trees in the terrace above the garden

Feb 24
2:30 pm
New Gardener Orientation
                                                                                                         

Collard Greens with Coconut & Garlic

Hey Everyone,

My son and I were looking for a different way to prepare our collards.  We stumbled upon this recipe posted on a blog somewhere and thought we would try it.  I know, I know, coconut in the collard greens, quit laughing!  While not a traditional recipe by any means, it actually was quite delicious.


Collards with Coconut
Ingredients:

1 extra-large bunch of collard greens
1 small onion chopped
2 to 4 cloves of garlic, slivered or minced (3 -4 if small or 2 large)
2 heaping tablespoons of grated coconut
¼ - ½ teaspoon red chili powder
¼ - ½ teaspoon turmeric powder
Salt as desired

1 tablespoon olive oil

Directions:

Thoroughly wash collard greens, dry, and remove hard stems.  Cut into thin strips.

In a large bowl, combine all remaining ingredients, except for the oil.  Add the collards and toss to mix well.

Heat oil in a large skillet.  Add the collard greens mixture and cook on medium until you see a nice steam, then reduce the heat to low and cook covered, stirring often.  Cook for about 10 – 15 minutes or until desired doneness. 

Hope you enjoy!

Denise, Beds 25 & 29   

Thursday, February 14, 2013

Gardener Wannabee

Today when Denise and I were at the garden we met a very fun gardner wannabee. He wants a plot so bad but we told him he'd have to wait until he was 18 to get a plot of his own.


He loves vegetables so much he was eating Swiss chard, spinach and pak choy fresh out of the garden.

Before he left he drew two hearts for Denise and I, and then drew 2 more hearts for all the other people who garden with us.

Artic Chill Coming

Warning, warning!

If you still have anything that you want to protect, we are going to have another week of very cold temperatures.  Actually, it will be a week of temperatures that will cause the plants whiplash. Pleasantly warm in the middle of the afternoon some days with below freezing temperatures in the dark hours.

Remember that with the high winds the windchill will make it even colder for the plants. If you cover, be sure your cover isn't touching your plants. This will help prevent burned plant parts.

Thursday Feb 14:        High 54,   Low 35
Friday Feb 15:             High 59,   Low 28 - very windy
Saturday Feb 16:        High 41,    Low 24 - very windy
Sunday Feb 17:           High 49,   Low 28 -  just windy
Monday Feb 18:          High 57,   Low 43
Tuesday Feb 19:         High 53,   Low 29
Wednesday Feb 20:   High 54,   Low 35

Monday, February 11, 2013

Soil Sample Bags Available in the Shed


While I was sweeping the 'red barn' floor, I noticed soil sample bags and instructions are now stocked there for anyone wanting the service.  The testing is done at UGA, costs $6.00 and turnaround is 7-10 days after the sample is turned into the County Extension office.  Your results will recommend fertilizer, lime or sulfur amendment specifically for what you tell them you're growing.  Also, remember that it takes time for the amendment application to be effective.  In other words, now is not too soon! to collect and send your soil sample before spring planting.  Instructions can also be found at http://www.cobbextension.com/ .  Click on PUBLICATIONS and enter SOIL TEST or C 896 in the SEARCH area.  While you're there, why not browse around to view all the professional and free publications for immediate downloading?  'Free' is good! and 'professional free' is even better!

More Foggy AM Pix - This time I got what I went to shoot

Above the terraces and beyond the garden there's a beautifully formed tree.  Which it is I won't know for sure until I see the leaves so if you know, don't tell me yet.  But it's nearly perfectly formed due to lack of competition from other trees and its longevity.  The photos were taken as the fog on Feb 6th was beginning to thin.  Same tree, slightly different angle.  I got so excited when I saw the contrail in the photo to the right that I would've lost the shot due to shaky hands but I'm thankful for my tripod and remote shutter release! 
The two photos were taken 15 minutes apart - that was my window of opportunity.  The image below was taken at 10:00 AM and the one to the left at 10:15!  Before 10:00, the fog was pea soup - too, too thick for my taste.

The Great And Not So Great Garden Companions

Hey Everyone,
Collard Greens

I was speaking with someone in the garden last week having trouble growing radishes in close proximity to their collard greens.  They mentioned neither had performed very well even though they did everything right. Hence, the inspiration for this post as it is a common problem you may encounter in the garden!  


From the symptoms they described of how their plants and produce appeared (both small and unproductive) and the proper steps they had taken in their care, it sounded like a simple case of bad bed buddies.  I certainly won't try to say that one fast three times!


Amethyst Radish
Amethyst Radishes
Territorial Seed 
Much like countless dogs and cats, some plants just do not get along.  While others have such an amazing connection, you are bewildered and intrigued by their behavior.   Many of my garden references state that Radishes and the Cole crops are actually bad companions in the garden as they somewhat repel each other.  Most often, this leads to stunted growth and poor development.  Not always, just more often than not!  

However, if you take those same radishes and plant them next to carrots, cucumbers, lettuce, peas, spinach, and a few others, they will all work in perfect harmony creating a symbiotic relationship.  I actually seem to find my radishes more on the sweeter side when I plant them beside my lettuce in the early days of spring.  They are also excellent to use as a trap crop (see definition below) for leafminers when grown alongside spinach and lettuce, or utilized as a repellent for cucumber beetles.  I use both these practices on a routine basis.

Trap Crop - A small group of plants often used in companion planting techniques to attract harmful or undesirable insects away from the main crop.

There is a substantial amount of information out there regarding the use of companion planting.  The science behind the concept is that some plants chemically enhance or inhibit each other's growth when planted in close proximity to one another.  In addition, it is believed that certain plants have the further benefit of either being able to attract or repel certain insects depending on your needs.  Much of it is proven scientific fact; however, you will always find some folklore mixed in.      

Raised bed gardening actually lends itself quite well to the practice of companion planting due to the close proximity in which each crop needs to be grown.  I have been experiencing a great amount of success with the method of utilizing certain crops to repel insects.  Garlic, parsley, mint, and radishes left to bloom are all workhorses in the garden for me.  With the rapid approach of spring, I thought I would offer some information on the topic to get everyone off to a great planting season with much success. The first link offers a base list to use in the garden for those that just want a quick reference of the great and not so great garden companions.  The second and third links provide some additional information on the topic.  

Garden Companion Planting Chart - link to a basic list of companion plants - vegetables

Companion Planting Techniques - link to some general information on companion planting

Companion Gardening Overview - link to some general information on companion planting
Great Garden Companions: A Companion-Planting System for a Beautiful, Chemical-Free Vegetable Garden
Rodale Organic Gardening
Reference
Sally Jean Cunnigham


"Great Garden Companions", by Sally Jean Cunningham out of Cornell University is one of the nice references that I use and is readily available on Amazon.  This book maintains its focus solely 
on the vegetable garden and provides detailed information for preventing pest problems utilizing common herbs and flowers.  I find quite a bit of success with many of her recommendations.


Happy Gardening!


Denise, Beds 25 & 29