Friday, November 30, 2012

Black Aphid Infestations


Hey Everyone,

I was at the garden today to remove my frost cover for the wave of warmer weather that is upon us and noticed small black bugs all over it, barely noticeable to the eye.  I didn’t think much of it until I removed my blanket and saw a tremendous amount of damage to my peas in just two days.  The plants were amazingly beautiful and vigorous when I viewed and watered them on Wednesday.

Vicki was kind enough to help me check my plants and many others.  While we didn’t see much with the naked eye, I happened to get out my trusty magnifying glass (I know, funny) and wow these little black bugs are everywhere.  We spot-checked several beds throughout the garden and all are heavily infested.  Vicki was kind enough to phone Amy at the extension office and with her help assisting us in what to look for and tracking different stages of development; it looks like a heavy infestation of black aphids.  Per Amy’s instructions, a simple insecticidal soap will rectify the problem.   

I thought it might be nice to give everyone a heads up.  Enjoy the wonderful weather this weekend.

Denise, Beds 25 & 29

Wednesday, November 28, 2012

War on Squirrels is Declared

Yes, you are reading this correctly.  War has now been declared on the squirrels in my bed!   I actually think the squirrels are getting back at me for taking more than my fair share of their nuts.  Kind of the eye for an eye theory.  Dalita thank you so much for letting me know I had issues.  Most days when I come to the garden, I see a little digging but nothing too unreasonable.  Well let's just say, today wasn't that day. What a mess.....

Since shooting the little critters is probably out of the question (I really wouldn't do that), I thought I would search for a kinder and gentler resolution.  After all I am gardening in their environment and do realize they were here first.  Nevertheless, really squirrels, if you want a carrot that bad, I will bring you one from the fridge.  Leave these alone, they are Mokum's and White Satin's.   I did come across some information and thought it may be helpful if any others are having the same issues.

The Organic Gardener's Handbook of Natural Pest and Disease Control (speaking of which is an excellent resource for those who are environmentally conscious) suggests poultry netting, repellent sprays for deer and rabbits, blood meal barrier, and drenching the bed with a castor oil repellent, commonly used to repel moles and chipmunks.  The book suggests using the netting in combination with another tactic as the best line of defense.  In addition, an eHow website (listed below) has a variety of other means to try such as used cat litter, blood meal barrier mentioned again, and a homemade hot pepper spray.  I am surprised to see cat litter as an option as to me this is a horrible choice to add to the soil.  I would love to hear if anyone has any knowledge of this tactic.

http://www.ehow.com/how_5411541_keep-squirrels-out-garden.html - link to the eHow website on How to Keep Squirrels Out of Your Garden

Normally, I use a little blood meal in the garden on a regular basis as an excellent source of nitrogen. Since I have it on hand and no additional cost would be incurred, I think it will be my first line of defense at getting the problem resolved.  I am thinking about putting a barrier around the base of the bed on the outside so I do not overdose my garden on nitrogen at this time of year.  Too much of a good thing scenario.  I figure that way it will only need replaced after a rain and will just settle into the ground naturally.  If this does not work, I would probably be inclined to try some pepper and garlic spray.  Does anyone have some thoughts on using a blood meal barrier?  Good idea, bad idea?

Consider this your notice little squirrels; you will be baffled by the mystery of the netting, repelled by the smell of blood, using a non-cow source, of course, and victory will be mine!

Called to Duty,

Denise, Beds 25 & 29


Monday, November 26, 2012

Garden Mysteries

The Garden was full of mysteries today!
 
Mystery # 1
 
 
Our new Garden Member
 
We (Dalita, Denise, Katrina and I) met the new Community Garden Member today. We don't know his/her name yet but we are sure we'll enjoy seeing him in passing. I'm not sure I want to be seen talking to him/her as I might get more odd looks than I already do.
 
 
Mystery # 2
 
 
The dark brown spots on the lettuce leaves is the frost damage

Today I could see the frost damage on Jane's Black Seeded Simpson lettuce. Boo hiss. But it was amazing how much of the lettuce didn't appear to have any frost damage on it. The temperature was the same for the entire bed but there must be little micro-climates all over that bed that protected so much of the lettuce. I don't know if it was the leaves of the artichoke hanging over the lettuce, the angle of the morning sun or what. The mysteries of gardening.


Mystery # 3


Here is the last garden Mystery of the day - How many of you know what is going on in this picture?
Good luck figuring it out!
 
Vicki

Sunday, November 25, 2012

Frost/Cold Report from the Garden 11-25

Last night was a good test of our cold weather defense mechanisms. Mike says the hoses were frozen when he got there first thing this morning! He also said there was a very thick layer of frost on everything. I know at 11:30 there was still a big chunk of frozen ice in the birdbath by the fence.


Seven frost structures of varying complexity were seen at 11:30 am

Denise's Super Structure with the truly cold defeating blanket kept her peas mostly untouched. Dalita's pea pods and flowers didn't make it through the cold even though they were wrapped in a light weight frost blanket. Over the next few days we'll see if the plants survived.

Since I didn't have the super good frost blanket I put jugs of hot water in my bed to give off a bit of warmth and provide a little more protection. I had five 1 gallon jugs spaced inside my structure which created lots of interesting micro climates. This morning the lettuce next to the jugs looked good however the lettuce next to the frost cloth looked rather wilted.  We'll see how it all works out over the next week.

 
Notice the new lettuce leaves to the right of the jug - they look very perky


I was in the process of opening both ends of my structure to let the air go through for ventilation.
 Definitely I made sure I left the bird netting in place to keep the squirrels out!
 
 
                                                                 Vicki

Saturday, November 24, 2012

Denise's Frost Cover Structure

Denise and Rick (Bed 29 & 25) have a great frost cover system. Their system is tall enough that large plants such as cabbage, broccoli and other cold weather crops can be covered easily. The sides of the structure go straight up as well.  Rick created a PVC bar to put over the tops of the poles that are hold up the trellis for the peas. (This is important because you don't want anything rough or pointy sharp that can rub a hole in your frost cover!!)

The frost blanket Denise is using came from Gardener's Supply -  The Garden Quilt  It is an excellent size for using on large plants as it is 20 ft x 20 ft and is good down to 24 degrees. This size blanket easily goes over the trellis for her snow peas with room to spare. Territorial Supply also has really heavy duty Frost Blankets/Row Covers - Territorial Seed Frost Blanket  Whichever you buy, just be aware that a 6 foot wide blanket will NOT be wide enough to cover your ribs length wise (end to end.) You will have to piece it together if you use 6 foot wide cloth which is very tedious and not as secure.


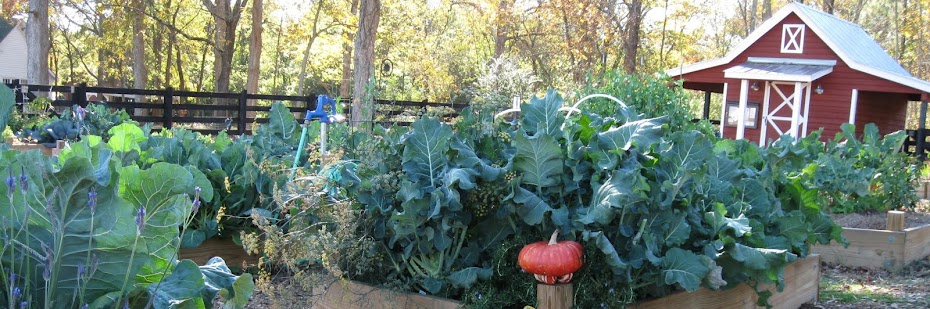
Denise's Most Excellent Row Cover Structure with Blanket for Bed 29


This picture shows the ribs of the structure for Bed 29


Materials Needed to make the ribs
The ribs in Bed 29 are taller and used these materials to make one rib.
    (The height from the ground to the top of the hoop ranges from 36" to 42" tall)
10 ft section of 3/4" SharkBite PEX tubing (plumbing supply section  $4.98 @ Lowe's & Home Depot)
1/2" inch standard rebar (2 ft section - $1.97 @ Lowe's, $1.60 at Home Depot)
   (the plumbing tube needs to fit easily over the rebar you choose)
Rick cut off 1 to 1 1/2 feet of tubing to form ribs of the desired height to fit the frost blanket Denise wanted to use. However, you can use all of the tubing if you want.

The ribs in Bed 25 are shorter and a different size tubing was needed to get it to bend properly for a short rib.
   (The height from the ground to the top of the hoop is 27" in this bed but you could make your ribs taller)
10 ft section of 1/2" SharkBite PEX tubing (plumbing supply section  $1.60 @ Lowe's, $2.85@ Home Depot)
3/8" all- threaded rod (2 ft sections $1.97 @ Home Depot)
  (the plumbing tube needs to fit easily over the threaded rod/rebar you are using)
Rick cut off a 2 foot section of tubing to form these ribs. You can use all of it if you want.


Rebar with tubing sliding down onto it
 
Pound the rebar into the ground so that approximately 6 inches is above ground. Do this to both sides of the bed. Stick the end of your tubing rib over the rebar and push the tubing all the way into the ground  (approximately 11" to 12" depending on the hardness of the ground/depth of soil in your bed.) Then put the other end of the tubing on the 2nd piece of rebar. One rib is now constructed.

 
PVC  structure

This is the "structure" that Rick created out of PVC pipe and fittings to hook over the stakes holding the trellis in place. Notice the ROUNDED corners that prevents wear and tear on the frost blanket!!

The last piece(s) you need are clamps/clips to hold the frost blanket attached to the ribs of tubing. You can order the  Territorial Garden Clip System  from Territorial Supply but they are rather pricey.

 
If you enlarge the picture you can really see the white clip that Denise is using that she got from Territorial Supply. As well, notice the clamps with red handles that were used to secure the excess fabric to keep it from flopping in the wind. The rocks she used are wrapped over and over in the bottom of the fabric.

Or you can make your own. Per Rick's instructions buy a 1 foot long piece of 3/4" white hose. Cut the white hose into 1" pieces. Cut one side of the hose piece. Make a 2nd cut and remove a small slice of the hose to form a C shape (but more closed than a capital C).  This forms your clip that you will use to clamp your frost blanket to the ribs. You want a small piece to be removed so you can easily clip it on the tubing rib but not so much that it doesn't tightly hold. Create one and test it out before you make all of the clips.

You need to make sure ALL pieces of your blanket are clipped down, clamped down, etc. Use rocks to anchor the bottom to keep the cold air out and to keep the wind from ballooning your structure. You may need heavy clamps to hold some of the extra fabric together on the sides.

(This post was updated Nov 26, 2012 with Denise's comments/corrections and a picture of the clamps & clips.)

Different Kinds of Frost Covers

The garden is looking kind of interesting these days! I took this picture Saturday morning to show all the kinds of frost covers that are popping up. Sunday morning I'll take another picture that will hopefully show more frost covers as two more popped up just before dark.


Dalita, Katrina and Denise used different methods of covering.
 
Friday I did a post about how to create a frost cover using the method that Dalita and Katrina used. The next post will have the method that Denise (Bed 29)  used which is tall enough to cover large plants. The final post will be on the method Vicki (Bed 41) uses which is good for lower growing plants.

Friday, November 23, 2012

Simplest Frost Blanket/Row Cover to use

Wednesday, Pikes on Barrett Parkway still had some Frost Cover/Frost Blanket/Row Cover available. It is stocked where they keep the bird netting and landscape fabric. The frost blanket they carry only provides 2-4 degrees of protection. For a hard freeze like Sunday morning you would have to put 2 or 3 layers across to achieve the amount of protection needed. A roll costs $9.95 and is 6 feet wide and 50 feet long.

The simplest way to use a frost blanket/row cover is to just wrap it around a plant like I'm doing here. It does help if you have someone to help when it is windy!


Dalita's peas being covered while a breeze is blowing

In the case of Dalita's peas, the vines are tender and the weight of the clothes pins drags the cloth down and somewhat compresses the vines. They recover quickly once you take the wrap off but if you need to leave it on for multiple days it could be a problem.

Rocks were used to anchor the cloth to the ground

Clothes pins anchor the loose end to the rest of the blanket

 The other easy way to use a row cover (no construction necessary) is to spread it over a bed like I've don on Bed 37 (Master Gardener Bed.) However there are drawbacks to just laying it on top. 

In the case of the MG bed, the Frost Blanket isn't really wide enough to cover all the mature broccoli and collard plants in the entire bed. The blanket is only 6 feet wide and there are tall plants throughout the entire bed. This means the frost blanket will have to be cut in two and anchored down, folded over, pinned together, etc to make a seam. It can be done but it is harder.

You can use a sheet but sheets are heavier and compress the plants more. Also, if there is wind it will flap and beat the plants up more than a special light weight row cover/frost blanket will.

Use rocks, landscape pins, etc to anchor the row cover down on all sides and ends.
Notice how the back side is not really covered! This is a staged picture.

Cold Weather Warning

Hello Everyone!
   I hope you had a great Thanksgiving and are ready for the weather to shift into a more Christmas like pattern. The shift begins Friday night!

Sat - low of 31
Sun - low of 26
Mon - low of 31

Then the temps go back up and the next "low low" will be on Thursday (32).

The important thing you have to remember is that frost can and will form at 34 or 35 degrees, especially in a garden that is so exposed like the Community Garden. The trees are far enough away they don't prevent the air from settling and frost developing.

The key to preventing cold damage to your vegetables (if you aren't going to use a row cover) is to keep everything well watered. Plants can tolerate more cold when they have been watered well.

If you have a chance, be sure and water thoroughly (not a sprinkle and run) on Friday but if you can't on Friday you definitely need to water extra well on Saturday!

If you want to look at the link Denise posted a few weeks back about the frost tolerance of vegetables, you can find it in this post on the blog.

                     Frost-tolerance-of-vegetables

Good luck everyone!

Vicki

Monday, November 19, 2012

Broccoli - ready for eating, ready to bolt


The broccoli in the garden is in all stages of development. From just starting to form heads, perfect heads ready to eat, heads well on the way to bolting and plants making side shoots after the big center head has been removed.


A perfect head, ready to eat!


 Notice how the head of broccoli is opening up and  the yellow flowers that are starting to show. That means the head is starting to bolt. If you like broccoli flowers, you'll enjoy it. But if you want the usual kind of broccoli, it needs to be cut sooner than later. ( The yellow flowers are especially noticeable if you enlarge the picture.)


The main head has already been cut off on a slant to prevent rain from collecting and
rotting the main stem.Small side shoots are growing and will soon be ready to eat.
Cut them off on a slant as well. Frequent cutting will keep the broccoli plant producing.

Cabbage Worms

I went to the garden today to take some pictures and what do you know...I found cabbage worms in two different beds (Jim's and the MG bed).  I did take them off the cabbages after I took pictures. If you have cabbage, you'd probably better check for them. I was reading that they hatch 5-7 days after the eggs are laid. This week it is going to be warm enough  for lots of eggs to hatch I would think.


This caterpillar was at least an inch long - he looked fairly mature.

Friday, November 16, 2012

Growing Lettuce in the Basement

Hey Denise,
   I'm really looking forward to growing lettuce in the basement under my plant lights this winter. I've been meaning to try that for at least 10 years and I think this year is finally going to be THE year. Thanks for telling me how you do it.

  Alas,  I knew I wouldn't remember everything you told me and I'm really surprised I remembered as much as you did tell me. I think I got all the steps written down but there are a few blanks in my memory (highlighted). Plus a couple of questions occurred to me since I got home. Help please!

1) You use Jungle Growth Organic or Jungle Growth Pro potting soil.

2) Then you do a soil drench of Actinovate.

3) Next you treat it with Azamax to keep off fungus flies.

4) Then you sprinkle on the lettuce seeds.

5) Cover it with vermiculite so no bare soil exposed.

6) Water from the bottom only.

7) Stick under lights and wait for yummy lettuces to germinate.

8) When the lettuce germinates and has two true leaves give it a quick spritz with the Azamax again.

  My additional question(s) are:
  What size pots do you use or does it matter?
      I think you said you don't use anything smaller than 6" because when you crowd the lettuces together they have more trouble.

   I would assume EBT Stone Tomato and Vegetable fertilizer would be a fine.  Or do you think something else should be used?


             Thanks......
                            Vicki

Thursday, November 15, 2012

What is eating the Cauliflower?

This week is a sad week for everyone who is growing cauliflower. Tuesday Jim showed me one of his cauliflowers that had half of it eaten and lots of black on the rest of it. We puzzled over it but thought it was just a one time problem.

Unfortunately, no it wasn't. Weds I saw Denise and was telling her about the weird problem. We decided to go peek in at the heads on Jim's cauliflower plants. UH OH.....lots of damage. Luckily I had Jim's cell number so I called to tell him he was being eaten out of house and home and he'd might want to come sooner than later or he'd have nothing left.

 
This is what Jim's cauliflower head looked like when he harvested it.
All the black is dirt from the feet of the critter
  
Before I ran up to the garden today (Thursday 11-15), I called Amy at the Extension office to talk to her about the problem. The best we could figure out is that some kind of rodent (field mouse, chipmunk, rat) has been crawling in and eating the cauliflower. What do you know...this picture helps prove our hypothesis.

 
If you enlarge this picture  and look at the two parts of the leaves
next to Dalita's thumb and finger, you can see little scratch marks

Dalita was a great help holding the cauliflower leaves back and we decided to peek at Jim's as well. Double Dang....more damage....one of his perfect heads had been half eaten. We looked at Jim's remaining two and he had more eaten. Triple Dang.....


A perfect head.....at 12:38 pm on Nov. 15
 
We wandered around looking to see if anyone else had critter damage. Yep, anyone who has cauliflower has critter nibbles. And by tomorrow it might be more than nibbles. Luckily Mike arrived at the garden just as I was leaving so I could tell him that his perfect small head of cauliflower wasn't long for this world.
 
Since we don't know exactly what is eating the cauliflower it is hard to protect the heads besides just cutting them real small. The two options are:
 
  1) Make a 5 sided cage with hardware cloth to put over the cauliflower plant.  The frame can be made with wood and  then cover the 4 sides of the square and the the top with the hardware cloth. Secure it so nothing can sneak through where the pieces meet. Once you place the frame over the plant,  pin it securely to the ground to keep anything from squeezing through. This is somewhat impractical for us because it would squish all the plants around it and/or not even fit in the bed properly.
 
  2) Use powdered fox urine. I've never used it but Mike has at home.  Also, I don't know precisely what brand Mike uses either, but here is a link to learn more about powdered Fox Urine if you are interested.  And lastly I have no idea if it smells either but it is organic!
                        Powdered Fox Urine to Repel Wildlife Pests
 
Amy did say that just because we had trouble with wildlife critters eating cauliflower heads this fall, it doesn't mean we'll have problems in the future. Every season is different.
 
         Vicki


Monday, November 12, 2012

Creating Pecan Picking Addicts just in time for Georgia Pecan Month

Did you know that November is Georgia Pecan Month?

Turns out all the fun Dalita and I have had creating pecan "addicts" this year was just in time to celebrate Pecan Month! The pecan pies that will be made from the pecans picked up will be another way to celebrate Pecan Month. By the way, Dalita makes a really scrumptious, yummy, to die for pecan pie. Once I tasted my slice I almost didn't share it with my husband but good manners finally prevailed.

It is even more fun to listen to Denise grumble about how much time she spends picking them up and how side tracked she gets.  I have to agree...it is easy to get side tracked and some days I have to tell myself I can only pick up the pecans in my direct path on a direct route from the Jeep to the gate of the garden. No wandering allowed!

My parents first took me pecan "picking" when I was 7 or 8 years old.  Parts of the campus at Florida State University were built in an old pecan grove and in the late 60's there were still lots of pecan trees everywhere. Which meant there were plenty of nuts available for anyone who wanted to spend the time picking them up.

It was certainly worth spending the time because you get high quality nuts without spending any money. Luckily my grandfather gave us a really wonderful nut cracker which made the job of cracking so much easier. The little two handle nut crackers you buy in the grocery store just aren't up to the job when you have a 100 lbs or more of nuts to shell.

If you google "inertia pecan cracker" you'll find pictures and links. The one we had used a rubber band to power it. In fact I call it a pecan smacker because that was what it did...smacked the pecan and cracked the shell. Another kind of pecan cracker involves a handle you pull down which is the kind Cobb Hardware carries.

Locally you can find a heavy duty pecan cracker at Cobb Hardware on Roswell Road  just off the Square in Marietta. Call (770-428-6491) before you go if you are interested because they sell out frequently at this time of the year.  They also sell the slinky kind of pecan picker uppers too. Not like mine or the one Denise has but a different kind.

So here are some interesting pecan factoids that I've learned:
  • Firstly, a pecan is not truly a nut! It is a drupe.  What is a drupe - a fruit with a single stone or pit surrounded by a husk. The pecan "nut" we pick up off the ground is the stone/pit.
  • Pecan trees may live and bear edible fruit for more than 300 years.
  • Just like blueberries, you have to plant trees from different cultivars to get pollination and fruit set.
  • Texas made the pecan tree its state tree in 1919.
  • Albany is the Pecan Capital of the United States and Georgia produces the most pecans in the United States with Texas 2nd in production.
  • There are over 1,000 cultivars of pecans (not including all the wild pecans).
  • Commercial growing of pecans didn't begin until the 1880's.
  • The U.S. produces 80 percent of the world's pecan crop.
If you want to learn more facts and look at pecan recipes, the following website is chock full of them.
              Pecan Growers Association - history and recipes for pecans

If you want to try growing pecan trees at home, the University of Georgia has a free publication available.
             Pecan Trees for the Home or Backyard Orchard - B1248

Lastly, as a word of warning - never, ever stop on the side of the road and pick up pecans while driving through or near a commercial pecan orchard/grove. You will be arrested and sent to jail. Depending on the amount of pecans picked up, it can even be a felony offense. In fact, you probably shouldn't stop near a private orchard either.

For free pecan trees...just wait until spring and they will be coming up in the beds! The squirrels have been busy planting them left and right.

                   Vicki

Sunday, November 11, 2012

Brussel Sprouts

After talking to Denise and Amy about Brussel Sprouts I decided to go home and read up on them. I've never grown them, only cooked and eaten them. Turns out there are a couple of things to remember when you are ready to harvest them.

Cut the sprouts from the bottom up.

They are best harvested in the cool months.

Don't cut the top until you are finished with the plant.

Remove the leaves from the bottom of the plant after you harvest the sprout from the leaf node so the plant will send all its energies to the other sprouts.

If you want more information here are two articles that had a lot of good information about growing brussel sprouts.

Garden Grower - How to Grow Brussel Sprouts

Gardening Know How - Harvesting Brussel Sprouts


The University of Georgia Extension Service has a really excellent publication about when to harvest vegetables. The chart tells you the proper maturity size to harvest produce for a wide range of vegetables. It also tells you when it is too early and too late to harvest for good quality produce.

When to Harvest Vegetables - C935


       Vicki

Black Swallowtail

Hey Vicki,

Those were black swallowtail caterpillars and carrots are considered a host plant.  I always knew about the dill, fennel, parsley and such, but have never had them on anything else.  I will definitely be checking my carrots on a regular basis now.  Thanks for the heads up!  Learned something new today!  Here is a link and look midway down, that was the little guys, they were just a bit younger.

http://www.joyfulbutterfly.com/articles/blackswallowtailindoors.html

Hey, where is the Pocahontas photo?  You are too funny!

Denise  

Thursday, November 8, 2012

Frost & Temperature Warning

Hey everyone!

They say the temperature is going to go down to 28 tonight (Thursday Nov 9). If you still have anything tender you might want to try covering it up. When I checked the hourly temperatures on the Weather Channel website, it said it was going to hit 32 at 4 am and not go above freezing again until 8 am Friday morning.  Even 4 hours will do a lot of damage to tender, cold sensitive plants. I'd better dash up to the garden and put a 2nd layer on my bed.

    Vicki

Sunday, November 4, 2012

Yay, Vicki!   from Rita B.

Frost Tolerance of Vegetables

Hi Everyone,

What an amazing idea to use a blog to communicate among the gardeners!  Kudos to those who have put this together for us.  

I thought it might be nice to post something regarding the frost tolerance of vegetables since the cool weather to come is inevitable.  I found this link on the website of Botanical Interests and it has some excellent guidelines of what your vegetables can withstand.  Please remember that these are only guidelines though, and if in doubt, you may want to cover.   http://www.botanicalinterests.com/articles/view/26/Frost-Tolerance-of-Vegetables  

And on a related note........

One of the most important things I have learned over the years is to realize that not all frost blankets are created equal.  Let's just say I learned that lesson the hard way! Wind chill is a factor.  It is wise to look for those that have a temperature rating listed on them.  As an example, protects plants down to 24 degrees or provides 4 to 6 degrees of frost protection.  This provides you with an idea of whether one blanket is enough or do you need an extra layer.  The blankets do work incredibly well and if diligent in your covering, many vegetables will continue to produce all winter.

Low or high tunnels are extremely easy to construct and if you look at Vicki's (Bed 41) or mine (Bed 29) it should get some ideas flowing.  I can't wait to see what we all come up with!  

Has anyone found some good pricing on frost blankets?  Pikes did have them on sale two weeks ago for $6.99.


Saturday, November 3, 2012

Welcome to the Green Meadows Community Garden Blog!


Why a blog you ask?

·        A blog is interactive
         ·        It has an archive
         ·        It is searchable
         ·        Tons of links are easily found

Everyone who joins this blog will be an “author”. Being an author gives you the ability to make posts – either text only or text and pictures.

 Why would you want to be an “author”?

You’ve gone to the garden and, horrors! There are bugs crawling around on your squash and a horrendously big caterpillar is eating your tomato plant. If you have a camera handy, take pictures of the culprits. When you get home, log onto the blog, create a post with pictures and a description of what they were doing.  Someone will be able to help you figure out what it is and how to deal with the enemy.

Not only will you find out what you have, you’ll be letting everyone else know to watch for tomato hornworms and squash bugs.

If you have questions, post them - someone will have an answer.
        ·        Why are the leaves of my cabbages turning purple? (Nutritional deficiency short answer)
        ·        What are those holes in my tomatoes? (Birds pecking your almost ripe tomatoes.)
        ·        What is causing all those holes and dug- up plants in my garden bed right now? (Squirrels planting acorns and pecans, drat them!)

 Or if you have questions for specific people…
         ·        Denise, why do you have black netting on your carrots? (I put bird netting down to keep the squirrels from digging up my plants)
        ·        Vicki, why do you have that white cage thing on your bed and how did you make it?  (frost protection using row covers and then explain how to make one yourself)

 If you notice a problem in a garden plot, you can post that on here and your friends can deal with the issue quicker.
       ·        Bridget, I noticed you have tomato hornworm damage. I couldn’t find them when I looked so maybe you already got them. And if you don’t know a name, say Bed 22. We all know our own bed numbers!

 If you see an interesting plant but you don’t know that you’ll see who planted it any time soon, take a picture and post it.
        ·         Kitty, what is that cool plant you have growing in your bed and where can I get it?

Please share any hard- learned lessons so the rest of us can learn also.  Or serendipitous discoveries!  Recommend particular vegetable cultivars. Share recipes for all the delicious veggies you are growing! When you have extra plants to share, post it and you’ll find a good home for the extra plants.  Maybe you want to buy a particular garden product but don’t need 30 lbs or 50 feet. If you find any website links you think will help, share those too.  Anything and everything related to gardening, eating and wildlife.

We want to make this blog as useful as we can to everyone at the community garden. The more participation from everyone, the better it will be!
 
                             The Blog Admins
                                      Vicki, Carol, Lisa, Linda & Rita