My frost row cover structure is a cross between the easiest one (just lay it on the ground and anchor it) and Denise's where you build a very sturdy structure. I searched on the web until I found what I wanted so I could show Vic since he was going to be the builder. Vic added the fence staple to the idea and this improvement made it work perfectly. Not a single piece flapped in the 20-30 mph winds of Sandy during the 4 days she blew.
MATERIALS NEEDED (and can be found locally):
Galvanised wire and Fence Staples found at the Lowe's on Dallas Hwy near Publix on Aisle 16 - General Hardware
Frost Blanket found at Pikes with landscape fabric and landscaping cloth
9 gauge galvanised wire
Aisle 16, in Section 13:
Hangers, Hooks & Wire. Maybe a third of the way up from the floor.
On the package it is called Multipurpose Wire, Single Strand, Item #52685 - 50 feet for $9.88. It will make 5 hoops (5 pieces of wire) - I only made 4 but had enough for a 5th hoop.
Fence Staples
Aisle 16, in Section 23:
Construction Nails
Item # 69233 Fence Staples 1 lb of 1 1/2 " galvanised fence staples is $3.46. Used 8 fence staples for entire project, one on each side of the bed for each hoop to sit in (only made 4 hoops so only needed the 8 staples.)
Frost Blanket
I used a frost blanket that comes in a roll 6 ft by 50 foot and is good for a light frost. This means this particular frost blanket/cloth provides 2 - 4 degrees of extra protection. You can find it at Pike's for $11.99. Or you can also order the light weight cover from
Row Cover - Pine Tree Seeds for 33 cents a foot plus shipping. Or you can order a heavy duty frost blanket from Gardener's Supply
Garden Quilt - 6' x 20'
The first thing we did was decide how far apart to make the hoops in the bed. They are spaced about 2 feet apart. The one thing you have to be watch out for is your placement of fence staples - put in the bed away from the corner posts. Vic put in fence staples one on each side of the bed for each wire hoop (2 staples for each hoop).
Wire hoop put through the fence staple and pushed as far into the ground as it will go
Because my frost cloth was only 6 feet wide I placed my hoops inside the bed so it would be easier to cover and securely anchor the cloth to the ground. I also chose to have only 4 hoops this fall as that was all I needed. If I were to cover the whole bed I would use 5 hoops.
Notice the first hoop is to the right of the square post inside the bed!
To make the hoops be 16-18" tall in the center, cut the wire about 91 inches long (7 ' 7")
If you make the hoops too tall in the middle, your 6 ft wide cloth will be too narrow and you won't be able to anchor it.
Push one end of the wire through a fence staple until it hits the ground. Then bend the wire hoop over to go through the 2nd fence staple on the opposite side of the bed and push it through until it hits the ground.
My frost cloth is 122" long (10 feet 2 inches) which covers the 6 feet of bed very nicely length wise with enough on each end to anchor it down firmly. I also have enough cover on each side to pin down securely with rocks or landscape pins.
Originally I used landscape pins but now, I just use clothes pins (5-6 per wire hoop) and rocks. Everything has stayed in place very nicely. If you do use landscape pins, put twisties or something colorful on them that sticks up so you can find them which will make it easier when you want to pull them out.
My philosophy is many clothes pins is better than one!
Lessons Learned:
Next year, don't plant to the edge of the bed. I need to leave a 2 or 3 inch unplanted border on the inside of the bed so I can use rocks/pins to anchor my cloth without worrying about smashing the plants.
12 inch by 12 inch piece of lattice work
Think about how tall various plants will be so that plants that need more height get put towards the center of the hoop. I also will use something like this piece of lattice work to make the sides of the frost cover go up straighter for the first 12 inches. But don't use anything rough that would rub a hole in the frost blanket when the wind whips it around!
Netting over hoops defeating the squirrels
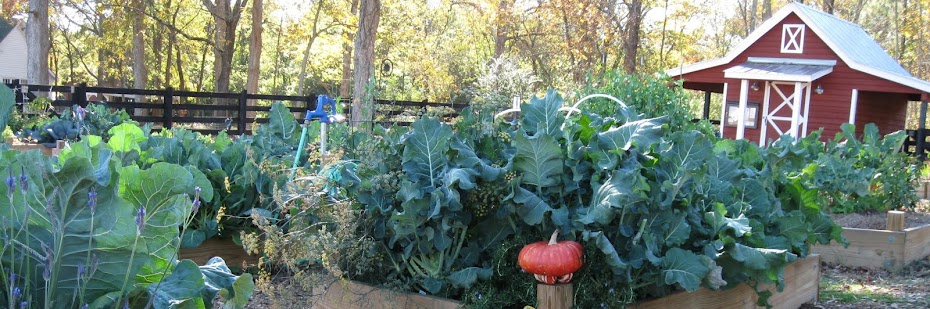
The wire hoops are an excellent support frame for putting bird netting over the bed and keeping the dratted squirrels out while they are in a frenzy burying nuts. As you can see in the picture below, you can just put the frost blanket on top of the netting when you need to.
When you need extra warmth inside, use hot water in milk jugs and strategically place them.
I found that water did not go through my frost cloth to my satisfaction. Luckily it was very easy to just unpin the end of the frost cloth (see picture to the left) and stick my water wand inside to water.
As well, I have two methods of venting when the temperature goes above 50 degrees. If you leave your frost cover on too long when the temperatures are above 50 degrees, you create the perfect environment for disease to grow. You need air circulation to keep diseases from running rampant.
IMPORTANT: depending on the frost cloth you use, only 85-60% of available light is getting through to your plants.Plants need light to grow and thrive.
Frost cover vented at both ends but
left over 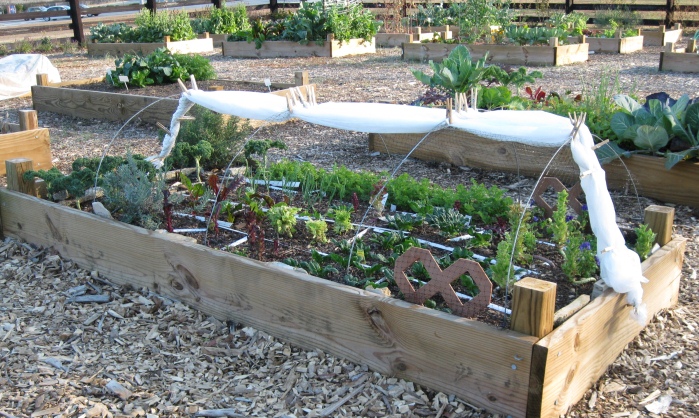 the frame.
I just gathered the frost blanket into a rope that created ponytails at each end.
The clothes pins gave the ends enough weight they didn't fly in the breeze.
This method lets all available light in yet the cloth is still easy
to let down as needed.
Updated October 22, 2013