Showing posts with label tools. Show all posts

Friday, February 21, 2014

Tool Safety and Garden Reminders

Just a few reminders for the garden

Trash those wild onions! Composting works but don't tempt fate with those wild onions.

Prevent tripping Hazards

Clean and put up any tools and equipment you use.

       Thanks!
What a big mess of wild onions someone removed when they weeded.
Only thing is...wild onions need to be trashed, not composted.


Uh oh.....this shovel is all dirty....
 

Now it is nicely washed and ready to hang up on the wall of the shed.
Less to sweep out of the shed next time it is swept.


Hmmm...someone forgot to put the tools up and sweep out the wheelbarrow.


An accident waiting to happen
 
Safety conscious - no one will trip over these tools.


A fork or a shovel - which is the best to use when turning the soil

Shovel and spading fork
Officially there is no "right" tool to use. But on a more personal level, everyone has a preference. I prefer using a spading fork because the tines are flat and broad. (Also it has a short handle which works great for short people.)

Taller friends of mine use a pitch fork because the handle is longer. The drawback is that the tines are thin and spiky though the tines are closer together than the tines of the spading fork.  My tall friends have used the spading fork but after awhile, it kills their back because the handle is too short for them.

You can  just use a shovel (long or short handled depending on your height) to turn the soil as well.


 Here you can see the progression of digging with the spading fork. The first forkful there is kind of a clump of dirt. The second forkful, it is falling through the tines. If you think your soil might be a little too wet, this is a great tool to use to prevent making clumps of dirt.

I also find that when I'm mixing in my amendments they tend to blend better when I use the spading fork. Kind of like a whisk works to blend flour and sugar in a bowl.  Shovels tend to make it harder for me to mix my amendments. But I do know people who only use a shovel and still have beautiful, to die for, soil.

 As you can see, when using a shovel, the first shovelful of dirt is a big clump. It will take more effort to keep from creating a bed full of clumping wet clods if the soil is too wet.

A compromise if you aren't certain about your soil moisture level is to turn/fluff your soil with the spading fork for as long as your back can handle it and then mix in your soil amendments with a shovel.

But really, it all boils down to what YOU like and what YOUR body can tolerate! As long as you end up with beautiful, healthy, fertile soil, it doesn't matter what you use to turn it.

Thursday, February 20, 2014

What is Sifting the Soil?

A number of gardeners have asked "What do you mean when you say sifting when you talk about soil rejuvenation.

Cheryle ready to sift the soil in her bed
That is really a good question and it isn't necessarily obvious. Sift? You sift flour and sugar together when making a cake to lighten the texture but how does that work with soil rejuvenation and bed preparation.

 In the garden we use a huge wheelbarrow as our "bowl" and have a piece of hardware cloth nailed into a wooden frame as our "sifter". Place the frame over the wheelbarrow, shovel dirt on top of it and then move the dirt around with your hands.

Sifting removes lovely critters like these grubs (Yuck).  Grubs are really bad critters to have in your vegetable bed since they eat the roots of your tender seedlings. The other bad bugs you want to look for are wireworms and centipedes.

Wireworms eat into root vegetables which spoils them and centipedes eat tiny earthworms. You want earthworms in your garden bed because they are beneficial to your soil structure. The earthworms aerate and leave behind worm castings which is highly desirable.

The other reason you sift the soil is to remove rocks and sticks as well as make the soil "fluffy". If you are trying to grow carrots the lighter and fluffier the soil the better. Also, if a carrot hits a rock or stick, it has to grow around or over it and you end up with carrots that aren't straight and perfect.

The good news is that once you sift your bed to remove "stuff" you don't have to sift it again unless you add amendments that have large bits of "stuff" in them.

Vicki

Wednesday, May 1, 2013

Poison Ivy Pullers

Along with the greening up of all the wonderful trees, shrubs and flowers that we like we also have the greening up of that hateful but wonderful native plant - poison ivy. Because the garden was built in an area that had been left to run wild, we have a poison ivy problem.

Inside the garden we've about got the old poison ivy vines removed. Outside the garden, behind the shed and along the back fence, there is still lots of old poison ivy that is leafing out. However, there are still a lot of seeds in the soil and the birds keep depositing more seeds. When you weed under the pecan tree, weed with caution.

Poison ivy does have its uses (gorgeous foliage in the fall, beautiful flowers in the spring and it is a favored source of food for birds)  but it does tend to grow where you don't want it. We've come a long way with getting rid of the poison ivy in the garden, but it still pops up from time to time.

The best way to deal with poison ivy is with respect and caution. I believe in pulling and discarding poison ivy because dead leaves can still cause poison ivy for those who are highly allergic. If you use an herbicide on the plant, it kills the leaves but then the leaves fall off and are in the leaf litter. When you rake up leaf litter/debris, those dead poison ivy leaves are still in there waiting to cause misery.

Hairy Rope - Don't be a dope
Leaves of three - Leave it be


Pulling poison ivy will transfer the oils in the poison ivy plant onto your gloves. You can always use plastic gloves but I much prefer newspaper or bread bags. It is one way to recycle that unending stream of bags. Using the bag method, I'm protected up to my elbows and I've got something to put the poison ivy in after it has been pulled.

If I know I'm going to have really long pieces of poison ivy, I have grocery or garbage bags to stick them in. This protects me as well as the garbage men who deal with my trash.

The leaves on seedling poison ivy are not as big and can be confusing to recognize because the poison ivy doesn't quite have the same kind of leaves that go with the poison ivy sayings below. If you don't know what poison ivy looks like, memorize these sayings until you do.

Leaves of three, leave it be.
 
Hairy rope, don't be a dope!

In other words, if you don't recognize the plant and it fits one of those two sayings, don't touch!

 
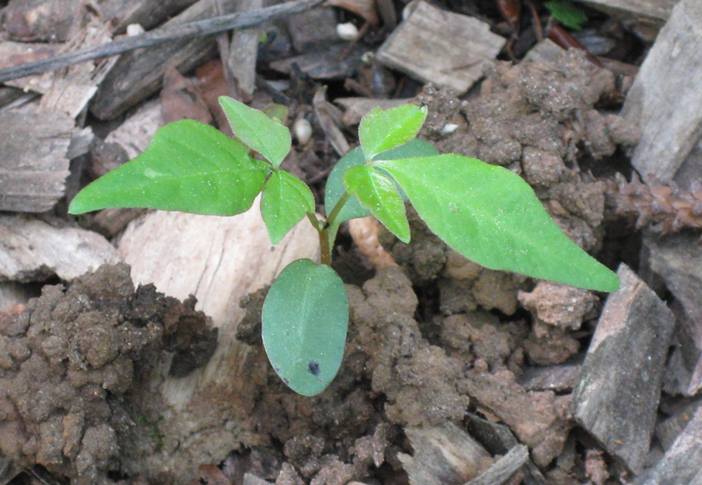
This is baby poison ivy. It doesn't quite have 3 leaves
yet and looks very similar to other desirable plants.
If in doubt, leave it be.
 
There are lots of good plants that have three leaves or have hairy vines. Don't destroy them until you know what you have. You could be tearing out a highly desirable native plant.

If you want to learn to identify poison ivy on your own, just ask, we can show you many great samples of poison ivy in the woods and the hairy rope as well!

Special thanks to Kitty for being my assistant with these photos.

Monday, April 29, 2013

Pestiferous Wild Onions

The wild onions we have in the garden are pestiferous to the max.

We are going to experiment with several new ways of getting rid of them but in the mean time, the best way to get rid of them is to dig down to the very bottom of the stem and gently extract the onion bulb and all its bulbils.

If you don't, you leave the big bulb and all the baby bulbs  behind to resprout. It does take longer to get them all out but if you do you are rewarded by not having to get mess with them in the future.


Saturday, April 20, 2013

Tool Safety

I'm always reminded each season that there is a right way and a wrong way to temporarily leave my tools sitting around. Usually I only manage to trip but there have been a time or two I've managed to knock myself in the head with a tool. Small tools with tines can be just as dangerous as tools with long handles.


Never leave a tool with the tines up!
 If you step on it you can
  • A: Knock yourself in the head with the handle when it flies up
  • B: Leave claw marks on your legs
  • C: End up with a hole in your foot


This is better because you won't step on the tines
but you can still trip over the handle.


Much better! You are less likely to trip over it
 when it is propped up like this.